Showing posts with label halloween banner. Show all posts

Wednesday, September 12, 2012

Burlap Banner Tutorial

Okay...are you ready? As promised:
Here is a quick video tutorial on how I made my burlap banners in this post.


This is what I did with it:


I have loads of these fun abandoned windows in my shed...waiting for new life~thanks to the hubby for being in construction! I added an expired Decor Element crow at the bottom...I wish Stampin' Up! still sold vinyl :(

Please let me know if you have any questions!! See you tomorrow!
-Erin
Shop online 24/7 (even in your P.J.'s)
www.erinsstampart.stampinup.net

Sunday, September 9, 2012

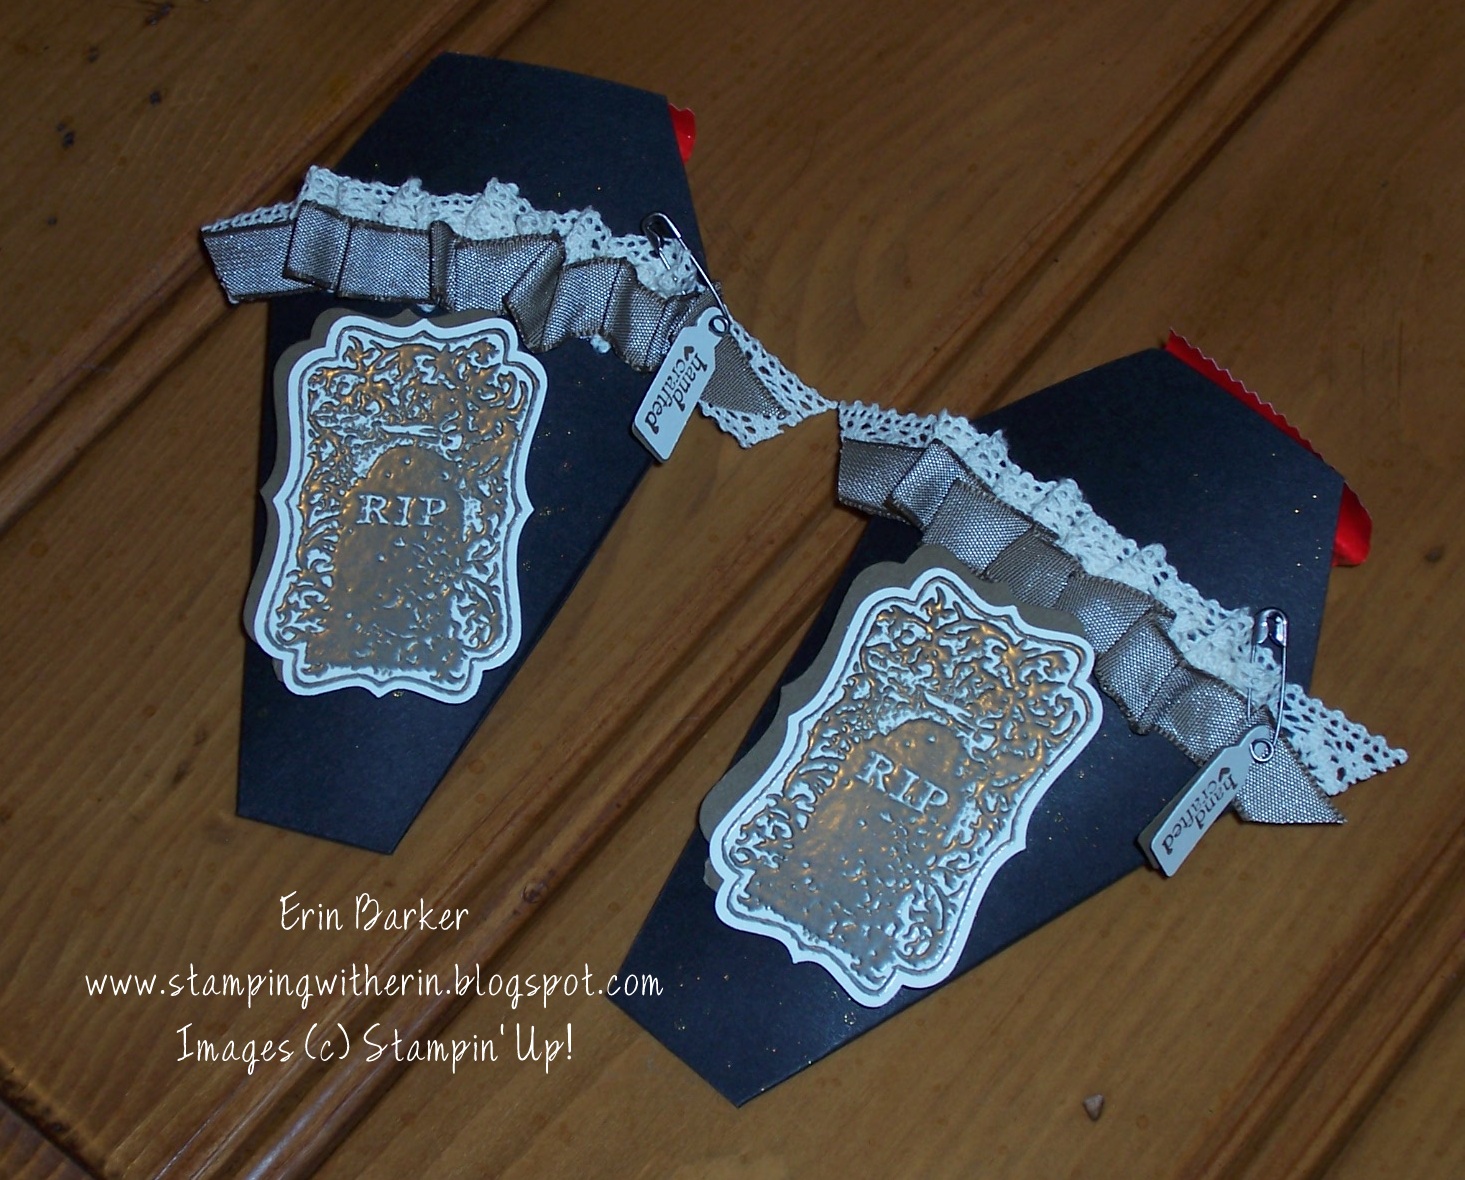
Prettiest 'coffin' ever!!


This might be the prettiest coffin I have ever seen~ LOL! It doesn't look 'spooky' at all!! Very appropriate that I used the RIP image from the Toxic Treats stamp set.  Aren't they cute??

Not sure how well you can see in the photo the shimmer...but before it was embellished I spritzed the Basic Black CS with the Log Cabin (just like dirt...get it??). I have had SO much fun over the last several days making Halloween goodies. These were inspired/CASED from Selene Kempton who presented them at the Providence, RI Stampin' Up! Regional event. This Petal Cone die can be used for lots of ideas...a MUST have in my opinion. Examples: carrot, chinese take-out box, ice cream cone, the ever so cute 'coffin' and more!! Order yours today!!

Last Friday night I hosted a Stamp Camp and the customers who brought a new stamping friend received this favor as a special treat from me. Aiden (my youngest) has asked if this is what I can make for his classmates for Halloween...he has about 19 kids in his class and this is the perfect treat. Thanks Mr. 'Big Shot' for making this momma's life easy! During Stamp Camp my friend Sherri heard me say "Easy Peasy" (which I say alot) 'Easy Peasy Lemon Squeasy' or is it SQUEEZY? . Well...this project is just that! Check out her tutorial and try for yourself!!

Supplies:
Stamp Set: Toxic Treats (127898 C) Tiny Tags (118592 C)
Card Stock: Very Vanilla, Basic Black, Soft Suede
Ink: Versamark pad (102283)
Access: Log Cabin Smooch Spritz, Soft Suede taffeta ribbon, vintage trinkets, crochette trim, pewter embossing powder, heat tool, punch, sticky strip, decorative label punch, dimensionals, jewelry tag punch


Here is one of the cards that they made using the same stamp set Toxic Treats.


How is opens:
Notice how I added additional bubbles with our basic pearls??

Supplies:
Stamp Set: Toxic Treats
Card Stock: Sahara Sand, Very Vanilla, Tangerine Tango
Ink: Tangerine Tango, Versamark pad, Crumb Cake
Access: pewter embossing powder, heat tool, framelits labels collection, Big Shot, stamping sponges, basic pearls, Big Shot, Vintage Wallpaper embossing folder,

Cute huh? Click here to see how to use 1/2 of the framelit in the big shot to create the 'swing'.
Now...check this out:


Sneak peak: They also made this burlap banner...which I am in the process of filming a video tutorial for...stay tuned!

Here is a close-up. I asked my hubby to make me a fence for above our cabinets and he spray painted it black. Seriously....I LOVE that man...he whipped it up in like 10 minutes!!
Here is the other 'Spooky' side:
Now one more thing to share with you...my latest Halloween decor item...meet 'The Old Hag'..isn't she AMAZING?? She is holding a glowing battery operated tealight candle...I just HAD to have her!!

I can't wait until later today...while football is on~ I will be decorating!!!!!!! All of my boxes/bins have been brought down from the attic. YAY!!!
Then we bowl tonight...another YAY!!!

Contact me if you have any questions!!
Stampin' hugs,
Erin
Shop online 24/7 (even in your P.J.'s)
email: stampingwitherin@yahoo.com

Friday, August 31, 2012

Friday the 31st..and a full moon!!

TGIF!! Today is not only Friday...which the kids are happy about, but it's the last Friday of August...which means I have permission from the hubby to start decorating for Halloween!!

Oh..and it's a Blue Moon tonight~ super SPOOKY!!

Normally I get crazy during the middle of summer~ I know 'crazy' right?? It's my absolute favorite holiday...I love to make crafts, cards and gifts too!! In the past I have made a few spooky trees, this year my tree was quite a workout!! I ventured out on a bike ride with my son Aiden and while on a path through the woods I found 'THE ONE'. You know...how it just speaks to you? Just like picking the right Christmas tree. So the problem? It wasn't just a cute little branch..it was a tree!! I couldn't even break it into two pieces to bring it home!

I was SO determined (I mean..what if I had left it and came back for it with John's (hubby) truck and someone had the same thought that I did and took it...! So...I rested part of it on the handlebars and pedalled ALL the way home...probably looking somewhat like a freak!

Anyway...once home, John sawed it into two pieces and I spray painted them black (this time I used a satin black spraypaint).I bought an urn..some rocks and voila!


I loved Kimberly's ornaments she made one Halloween, so check out her tutorial here for the cones and here for the scallop square ornament. I used the new Howlstooth & Scaringbone DSP (126906) from the Holiday Mini Catalog for mostly all of the ornaments. They will be filled with some black tulle and treats for holiday...just can't fill them yet because the kids will eat em' all up!
Close up's:


This last one is the owl...turned upside down and the feet cut off...cute huh?? Spooky??

With the left over scallop pieces from the Perfect Pennant die, I made these cute little ornaments...these rosettes were made using the 2 3/8" scallop circle punch (118874).


Other supplies used: Bat punch (on the clearance rack!), Champagne glimmer paper (127885), spider web embossing folder (120889), First Edition DSP (121878), Simply Scored (122334), decorative label punch (120907), Timeless Type Alphabets (retired), Scallop Squares Duo (120903), extra-large oval punch (119859), clear embossing powder (109130), antique brads (117273), linen thread (104199), modern label punch (119849), owl punch (118074), scallop square punch (119884), jewelry tag punch (117190), 1/16" circle handheld punch (101227), vintage trinkets (118764), rhinestones (119246)...and lastly~EVERYTHING was sprayed with Champagne Shimmer mist!!

Yes...you guessed it~ the glue gun was this girls BFF over the last few days!!

Now...as you will see I used a few retired Halloween sets...and I was very proud of myself for doing so!! I loved them so much I felt bad that they were sitting in a box being neglected~ I was wishing I had ordered Toxic Treats (127898 c) but I was a good girl and didn't~ well not until the other day...when I just HAD to have it (you know how it is)! So when that baby is all inked up..I will share some goodies with it! Stay tuned!

Here using the same paper...I created a one-sided banner. The letters were created with the Serif Essentials die for the Big Shot...can't believe that it is retired..I still use it ALL the time!


Lastly here is a wreath that I made: don't you love the spider?? The rhinestones were colored black with a permanent Sharpie marker (only takes a minute or so to dry!) Here is the tutorial that I followed on making the wreath. Total sheets of the DSP that I used for all items (banner, ornaments AND wreath were 6 sheets!!) In her video she used 6 sheets on her wreath, you could add more and your end result would be that it is a 'fuller' wreath.
Here is a close-up:
 
 
If you have any questions, please don't hesitate to ask!!
Have a great spooky night!


Sunday, October 23, 2011

It's a bird! It's a plane...no it's a bat!!

I first saw this bat here on Shelli's blog~ she had demo'ed it at a recent Regional event and it immediatly went into my fav's.

I finally got around to making them...honestly I was thinking that they were going to be a bit difficult...NOT!!

Using the Big Shot with the Petal Cone die (121810) and the Perfect Pennants die (123126) made it a breeze...so I made a couple of them and hung them on a branch that I spray painted black. It's hung with some fishing line on my curtain rod~ began thinking that it might be something I keep up through the holidays...picture a white branch with cute little handmade ornaments!! Right now they are empty but I plan on adding some sweet little treats as a Halloween gift to our neigbors.
If you don't have a Big Shot yet....there seriously has never been a better time to join Stampin' Up!...until October 31st...you can earn one FREE!!! Just click the promotional flyer on the right for more info.


This card shown was featured in a previous post...but since it wanted to be on our piano...and it didn't want to be lonely I made it a friend by covering a battery operated candle with matching Frightful Sight DSP (122351) and voila!! Here is a close-up:


Here is a banner that I made in about 10 minutes or less...seriously!! I used the same Frightful Sight DSP and the Perfect Pennants die (123126). Punched out letters with the Serif Essentials Alphabet die (113464).

The other side says 'WICKED'.....because I love witches and these little witch legs in my dining room are the cutest!!


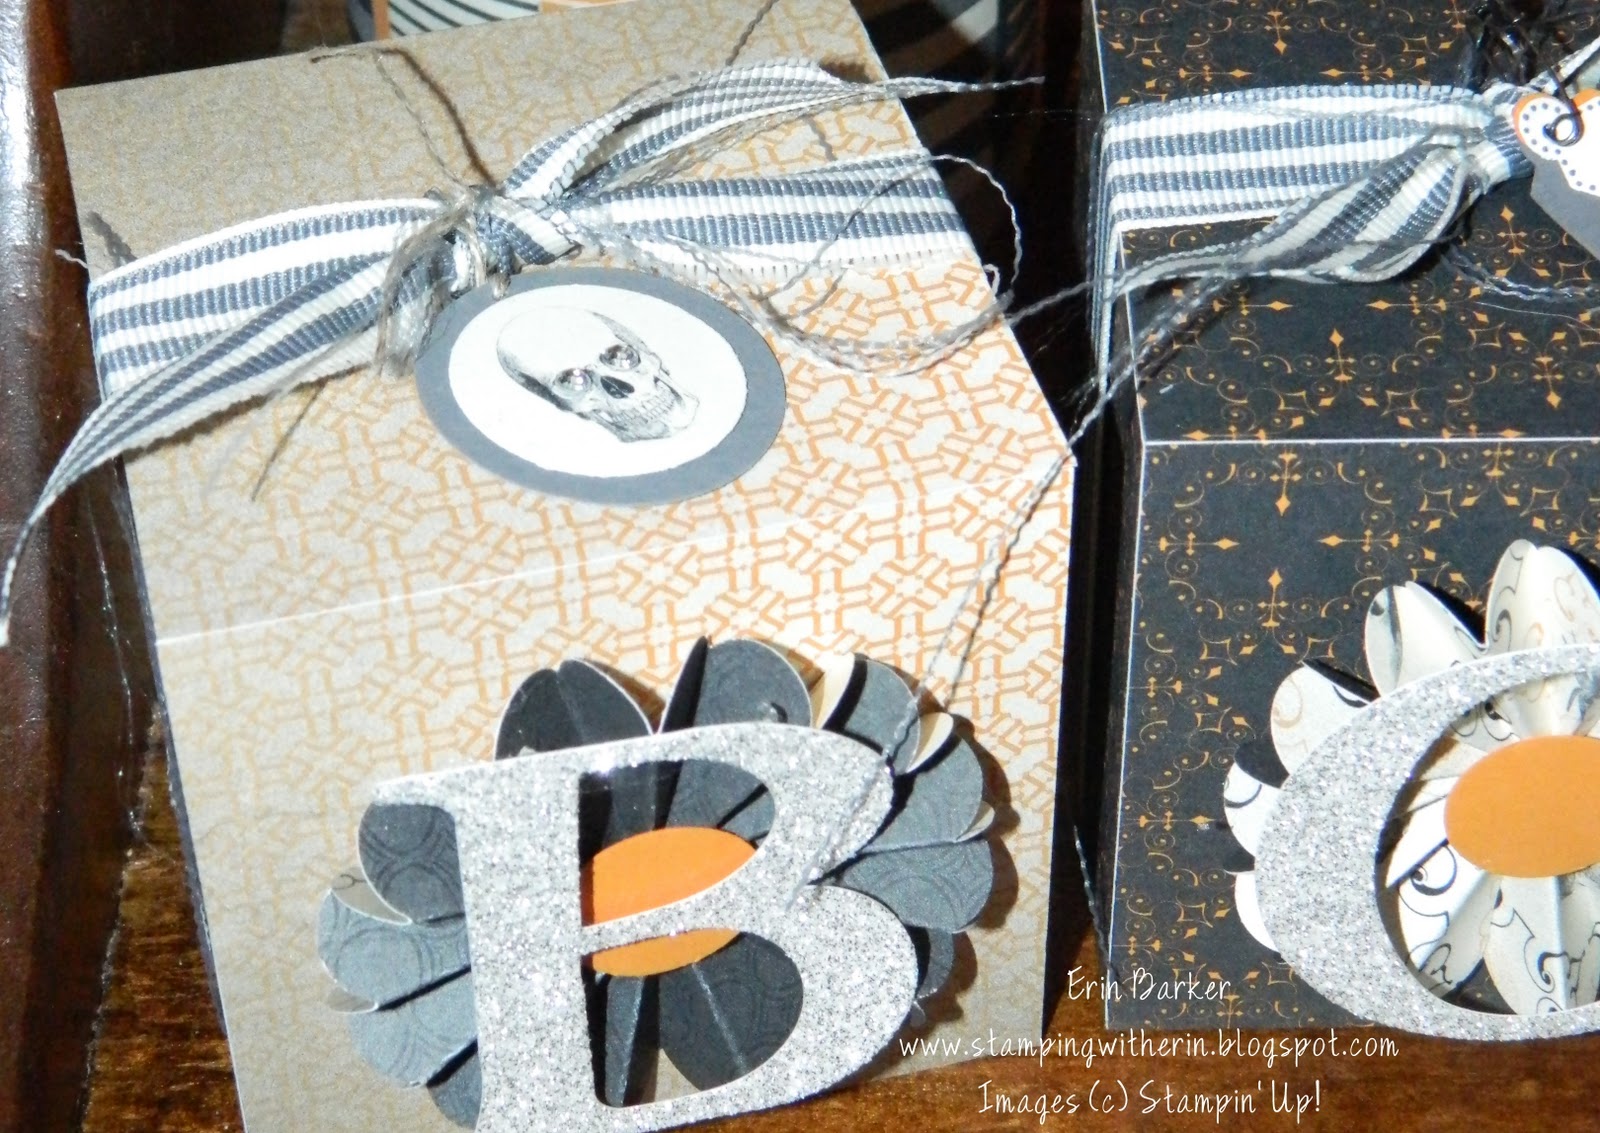
Here I have covered three of our Decor Blocks (116829) in Pick Your Poison DSP (124001). The blocks are shown on pg. 181 in the Idea Book & Catalog. These were totally an inspiration from another demonstrator Donna Hill (thanks Donna!!). You get 4 smooth, MDF natural wood 3" blocks per package for only $9.95. I love these little guys...you could decorate them for all 4 seasons and turn them as needed or stack em'...B-A-B-Y would be cute for a baby shower...the possibilities are endless!!
I also just covered the candles with the same DSP...easy peasy!!
Here is a close-up:

I had mentioned that I had a 'really' cool Halloween card to share with you?? Well...don't worry...it's coming. I am actually in the process of making a video to show how it works...stay tuned!!

Here is one cute and simple idea for a quick treat~ 

I used our new Cellophane Bags (124134), some candy corn and made a tag. Then I just stuck it onto printed Whisper White CS with some glue dots.
Check out this site for lots of cute 'poop' poems..below is the one I used.
Pumkin Poop
I started to carve a pumpkin
With my carving knife and scoop,
But the pumpkin got so scared
That he took a little poop!
It looked so cute and funny
Just like a candy treat,
So I'm sharing it with you now
Because you are so sweet!

I think that might be it for Halloween decorations and ideas...need to get started on some Fall/Winter goodies~ Christmas will be here before you know it..isn't that crazy??

Do you all make your own cards for the holidays?? Leave a comment and let me know what are your traditions...past and present. In the last few years I have not mailed out any hand-made cards (I know...terrible huh??) One year I made about 50 or so and never even mailed them!!
Not the case this year...I have recently found my 'Stampin' Mojo' and the fingers are constantly inky!!

So stay tuned for continued inspiration and let me know if you have any questions!!
Happy Stampin'
~Erin
Blogging tips