So many goodies to share with you today...first and foremost here are the projects that we will be making at my next Stamp Camp: This Friday (August 12, 2011 7-9pm) Click here for other upcoming scheduled events. If you have already seen the new Idea Book & Catalog then you know about all the new accessories and stamps..one of my latest favorites is the 3/8" ruffled ribbon!! Just sitting on the spool it looks so pretty!!

Card Recipe:
Stamp Set: Love & Care (123020 W, 123022 C)
Card Stock: Whisper White, Calypso Coral
Ink: Calypso Coral (marker), Daffodil Delight, Melon mambo, Temting Turquoise, Old Olive (marker)
Accessories: Floral Fusion Sizzlits (115969), Scallop Edge Border punch (119882), basic rhinestones (119246), Designer Frames embossing folder (123130), glue dots (103683), Calypso Coral 3/8" ruffled ribbon (122976)

Next are my 'hello' to fall goodies:
This card I received as a 'WOW' swap at Convention. Let me tell you...I was completely 'WOWED'!! It is called a Magic Color Card...and now you will see why...
 |
| View closed |
 |
| View open |
I know...isn't it AMAZING?? It comes from a fellow demonstrator Teresa Evangelista in Florida, I contacted her to see how she came up with this beauty because it is such and awesome technique!! (Thanks for the incredible inspiration Teresa!!) The tag was made using Sizzix Big Shot (113439) and Two Tags die (115954)..there is a trick too on how to avoid the score lines on the die...mark on the side where the fold is (I used our white Signo gel pen (105021)). Then roll the die into the Big Shot as you normally would but don't go all the way through...stop at the line you drew and back out...turn the die around and do the other side. Then use your paper snips to cut it out...GENIOUS!! I am thinking about making a video tutorial but with her permission..so I'll let you know!!
This is perfect for 'back-to-school'..my kids head back on August 24th.... Do you remember the commercial...where the dad is singing "It's the most wonderful time of the year!" I honestly have mixed emotions about it~ last month I decided it was time to go back to work since the kids are getting older. I have spent the last 13 years as a a SAHM and LOVED every moment!! So now during the days that I am at work I miss them terribly!! The last two days I was scheduled off and I have caught up on the laundry...gotten ready for tomorrow's Stamp Camp and cleaned the house...now it's time to relax with the kids and do some school shopping!!
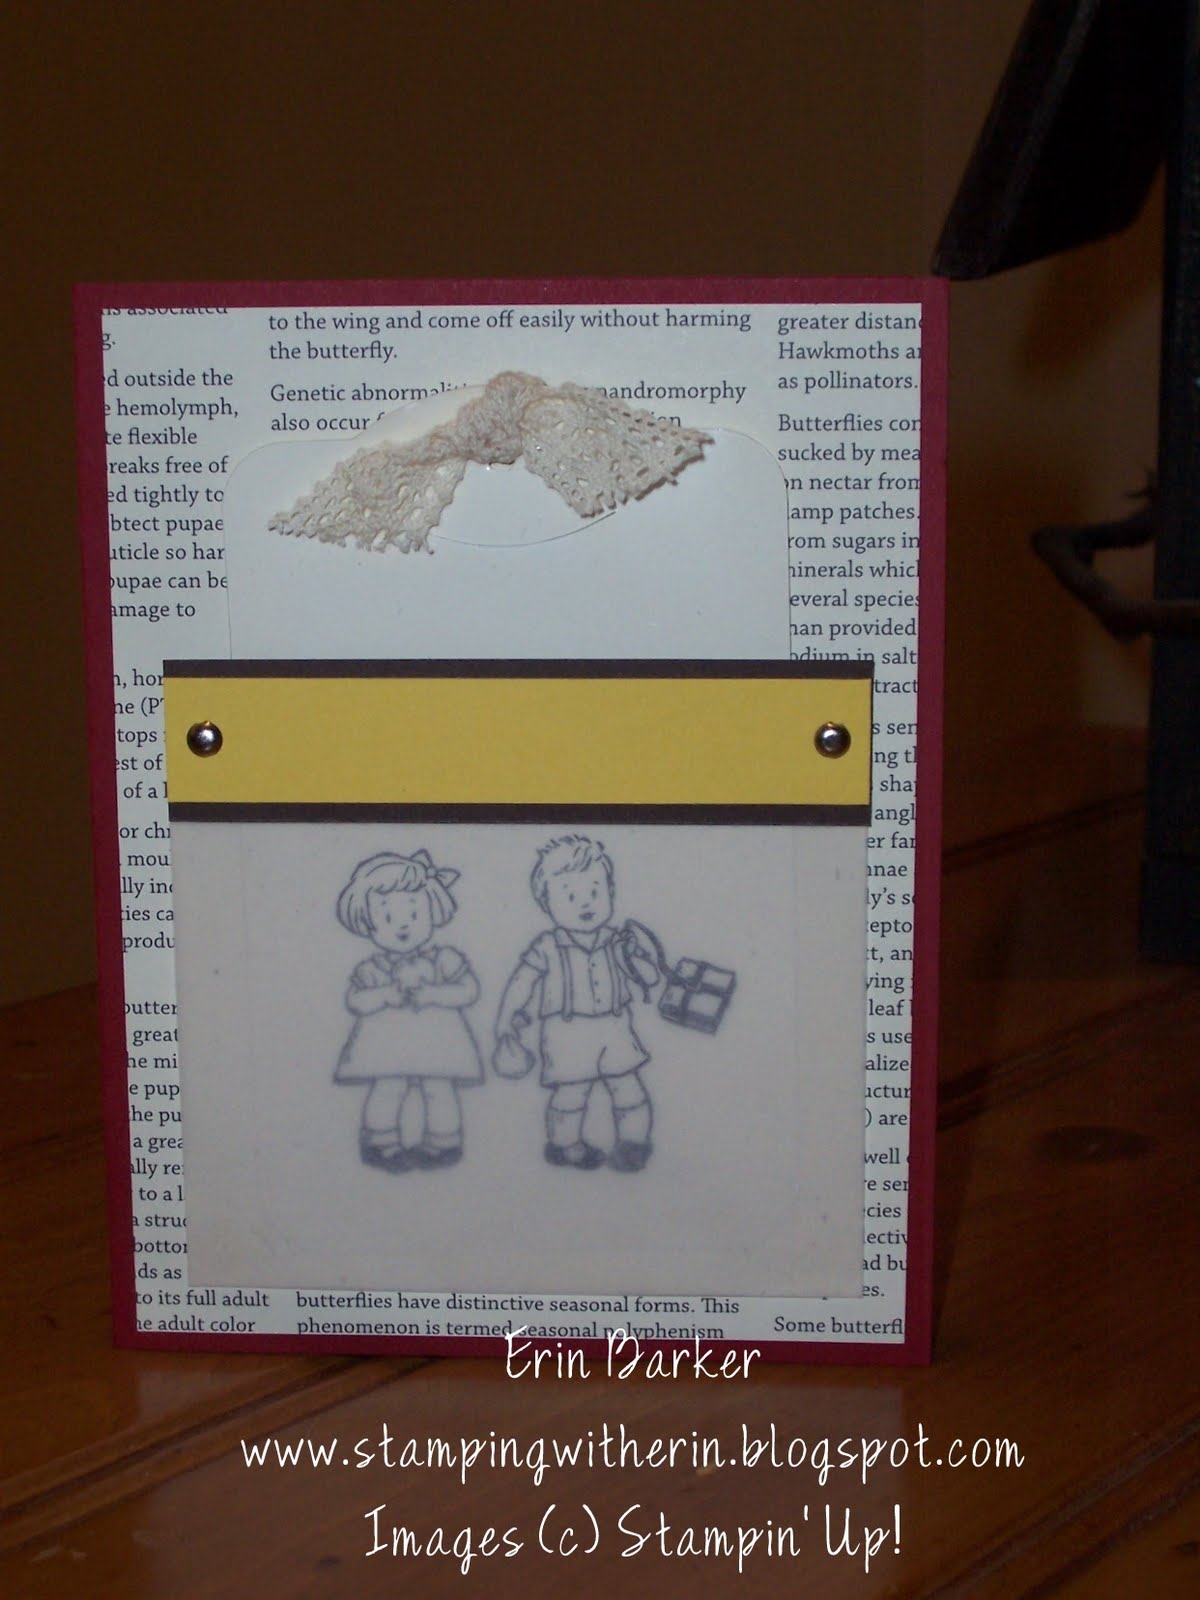
Card Recipe:
Stamp Set: Greeting Card Kids (119887 W, 120633 C)
Card Stock: Cherry Cobler, Very Vanilla, Vellum, Daffodil Delight, Early Espresso, Naturals Ivory, First Edition DSP (121878)
Ink: Staz -On black, Stampin' Write markers: Real Red, More Mustard, Not Quite Navy, Daffodil Delight, Early Espresso, Crumb Cake
Accessories: silver brads (104336), window sheets (114323), Victoria crochet trim ribbon (118481), paper-piercing tool (116631) and mat pack (105826).


Lastly is this decorated Fancy Favor box, made with the Fancy Favor die (115965) for the Sizzix Big Shot. Here is an image of the side:
The flower was created using the ornament punch (119847).
My downline Anne Butterfield made/cased this cute little rose box using the same ornament punch and hand-created box. She sponged the edges to add dimension and it's BEAUTIFUL in person!!

 |
| Side view |
Both are similar, hers used more petals which created a fuller flower....now here is a CUTE idea~ before I attached mine to the box, it was laying flat on the table..I thought about how cool it would look holding a tealight candle in the middle?? The possibilities are endless. Not sure if you can tell from the photo but the entire flower was spritzed with rubbing alcohol and the Champagne Mist shimmer paint (116806) this stuff makes everything prettier. I added an Antique brad (117273) to the center of a 1" circle punch (119868) and popped it up with dimensionals (104430). Hint: both the flower and box are held together using sticky strip (104294)...it is a must-have adhesive when creating 3-D projects.
That's about it for today, as summer comes to and end think about what the upcoming months have in store... Halloween, Thanksgiving...and Christmas!!! The next Holiday Mini catalog has SO many cute things to get your creative juices flowing...it's so exciting sitting here thinking about all the goodies I'm planning on making so stay tuned!!
Take care,
Happy Stampin'
~Erin
No comments:
Post a Comment