X's and O's mean 'hugs' and 'kisses' here!!
My husband made me a bunch of 'tic-tac-toe' boards out of luan a few years ago...have had them stashed away in a drawer not knowing what I was going to do with them...until now!! I decided to make the X's and O's (hugs and kisses) for Valentine's Day! The board measures 4 1/2"x 4 1/2" and is unfinished. I thought about painting them, or staining them...but this was WAY easy!!
Here is the back (again...stamped with Staz-On ink)
Directions:
First I stamped the X's and O's using Staz-On ink (so the ink would not smear) onto the More Amore Specialty DSP (129309). I used clear flat marbles, added just a dab of Crystal Effects (101055) to the back of the marble and pressed it down centered over the letter. Press firmly to squeeze the Crystal Effects out to the edges (removing any air bubbles). Allow to dry (approx. 10 minutes). Trim the DSP cutting as close to the underside of the marble as you can. I then used a sanding block to smooth the edges and sponged some ink.
Note: the stamp set I used here is Lovely Letters Alphabets (115030 W, 127796 C)
Pretty easy huh?? Give it a try!! If you are interested in purchasing any Tic-Tac-Toe boards, leave me a comment or send me an email stampingwitherin@yahoo.com for details.
February is a crazy busy month...birthdays galore!! In yesterday's post I mentioned my niece's birthday...at the end of the month is mine (but I am not getting any older!) and the day after mine is my brothers! In addition...the 19th is my Mom's anniversary..and my step-dad's birthday. For them I try to incorprate one card...two occasions (you know...two birds one stone?) Of course you also have Valentine's Day...so it's a perfect time for Stampin' Up!'s promotion Sale-a-Bration!!
Here is a birthday card I made for our neighbor (his B-day is 1/31) See what I mean about a busy month??
Not sure why this picture is crooked~ could be the few glasses of wine I drank before taking it (wink).
It uses a stamp set that I earned FREE from Sale-a-Brations called Feeling Sentimental (129627 W, 129630 C) and you can too!! Click here for details!!
Supplies
Stamp Set: Feeling Sentimental (129627 W, 129630 C), En Francais (109521 W)
Card Stock: Very Vanilla, Riding Hood Red, Crumb Cake
Ink: Riding Hood Red, Crumb Cake, Early Espresso
Access: stampin sponges (101610), glue dots (103683), silver designer buttons (129325), 7 16" natural trim ribbon (129287)
This next little tease it pretty cool~ just a sneak peak of my tea stained fabric!!
If you have noticed in some of my pictures previously posted...I like country decor~ 'primitive' is what I call it...me likey!! Now...that's not to say that I don't like the More Amore fabric (129307) the way it is.
But...this suits me MUCH better!!! The grungier the better...don't worry I will post what I have done with it when it's finished!! Here is what I did.
When I made the paper roses...posted here. I thought about making them look 'grungy' and dunked it into a cup of hot water with an opened tea bag. Not good...not good at all...my petals fell apart (soaked up too much water) and I'm sure the heat didn't help much either..Oops!!
Then the light went on inside my little 'pee' brain and I thought about our fabric~ tore a strip of it, crumpled it up and in the cup it went. Left it in there for about 30 minutes and rinsed the herbs off. It looked great, smelled heavenly and I couldn't wait to dye/stain more!!!
Have fun...dye it~ don't drink it!!
Let me know if you have any questions, or please leave me a comment and make my day!!
BIG hugs,
Erin
Shop Online 24/7 (even in your P.J.'s)
website: www.erinsstampart.stampinup.net
email: stampingwitherin@yahoo.com
Showing posts with label More Amore Specialty Designer Series Paper. Show all posts
Wednesday, February 13, 2013
Tuesday, February 5, 2013
Valentine's Day Decor cont.
Good morning!! I was SO relieved that we didn't get any snow lastnight. They were calling for a couple of inches and we didn't get any flakes at all!! YAY!
Seems as though the last few weeks the kids have really lucked out ~ we have had cancellations, delays and momma was wanting to STAMP!!!
When they are home, things just don't get done around here as they should (wink). What that really means...is that momma becomes lazy and plays way too many computer games than I should.
Or I spend too much time on stamping blogs, Pinterest, Facebook and well...you know the deal!
Just a quick post on a few more Valentine's Day decorations I recently made.
This first one is a glass block that is filled with a strand of white lights.
I made one last year, click here for that example. These are fun, lots that you can do with them...and the the hole is already there for the wire!! (Found this one at Lowes)
Here is a close-up of the top:
A couple of new products are used here...LOVING the Artisan Embellishment kit (129328) shown on pg.10 in the mini catalog!!
Here is how I got started...
Looking at all the goodies that come in the kit...I became inspired.
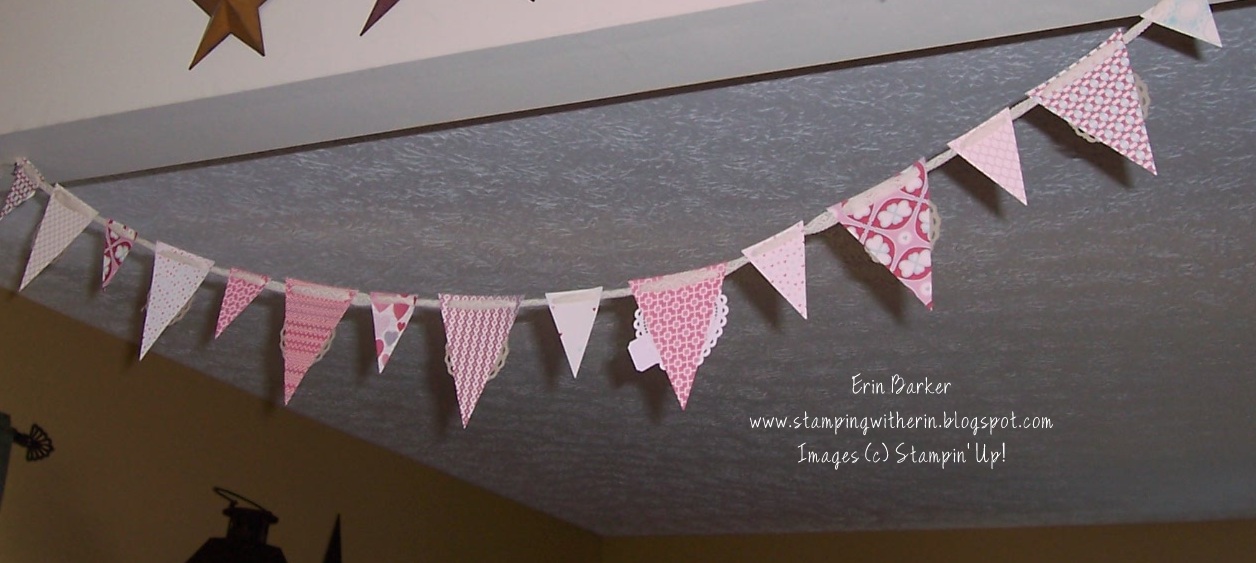
First I decided that I wanted another banner made with the More Amore Specialty DSP (129309).
Here is the banner:
Bad photo...(I know)...took this one with my cell phone.
Here are hopefully some better ones...I think the lighting is distorting the colors.
Bad camera too, ugh!
This one is of the back (it's still pretty!)
Here is another of the front: (don't remember if I used the flash on this one or not)
'Be Mine' is what it reads.
Here is a close-up of 'Mine'
Pretty self-explanatory...Big Shot and the Perfect Pennants Bigz l die (123126)
If you look at the kit contents again...there are these adorable little roses attached to some floral wire. I didn't know what I wanted to do with them yet...and I still have lots of other embellishments too.
I knew that I wanted to try making paper roses...have you ever heard of coffee filter roses? That was where I started...and played for a day....an ENTIRE day and wasn't happy with any of them. Then I started all over and began searching tutorials and found this site. I basically 'CASED' her idea and voila~ these are made using the ornament punch!!
Here is what I did for the back:
I hope to do a quick video tomorrow...stay tuned!!
Now my shelf is finished!! Me gusta mucho!!
Please let me know if you have any questions, or leave me a comment and let me know what you think!!
Have a great day!
Stampin' hugs,
Erin
Shop Online 24/7 (even in your P.J.'s)
www.erinsstampart.stampinup.net
email: stampingwitherin@yahoo.com
Seems as though the last few weeks the kids have really lucked out ~ we have had cancellations, delays and momma was wanting to STAMP!!!
When they are home, things just don't get done around here as they should (wink). What that really means...is that momma becomes lazy and plays way too many computer games than I should.
Or I spend too much time on stamping blogs, Pinterest, Facebook and well...you know the deal!
Just a quick post on a few more Valentine's Day decorations I recently made.
This first one is a glass block that is filled with a strand of white lights.
I made one last year, click here for that example. These are fun, lots that you can do with them...and the the hole is already there for the wire!! (Found this one at Lowes)
Here is a close-up of the top:
A couple of new products are used here...LOVING the Artisan Embellishment kit (129328) shown on pg.10 in the mini catalog!!
Here is how I got started...
Looking at all the goodies that come in the kit...I became inspired.
First I decided that I wanted another banner made with the More Amore Specialty DSP (129309).
Here is the banner:
Bad photo...(I know)...took this one with my cell phone.
Here are hopefully some better ones...I think the lighting is distorting the colors.
Bad camera too, ugh!
This one is of the back (it's still pretty!)
Here is another of the front: (don't remember if I used the flash on this one or not)
'Be Mine' is what it reads.
Here is a close-up of 'Mine'
Pretty self-explanatory...Big Shot and the Perfect Pennants Bigz l die (123126)
If you look at the kit contents again...there are these adorable little roses attached to some floral wire. I didn't know what I wanted to do with them yet...and I still have lots of other embellishments too.
Here is what I did for the back:
I hope to do a quick video tomorrow...stay tuned!!
Now my shelf is finished!! Me gusta mucho!!
Please let me know if you have any questions, or leave me a comment and let me know what you think!!
Have a great day!
Stampin' hugs,
Erin
Shop Online 24/7 (even in your P.J.'s)
www.erinsstampart.stampinup.net
email: stampingwitherin@yahoo.com
Subscribe to:
Posts (Atom)