Sunday, October 23, 2011

It's a bird! It's a plane...no it's a bat!!

I first saw this bat here on Shelli's blog~ she had demo'ed it at a recent Regional event and it immediatly went into my fav's.

I finally got around to making them...honestly I was thinking that they were going to be a bit difficult...NOT!!

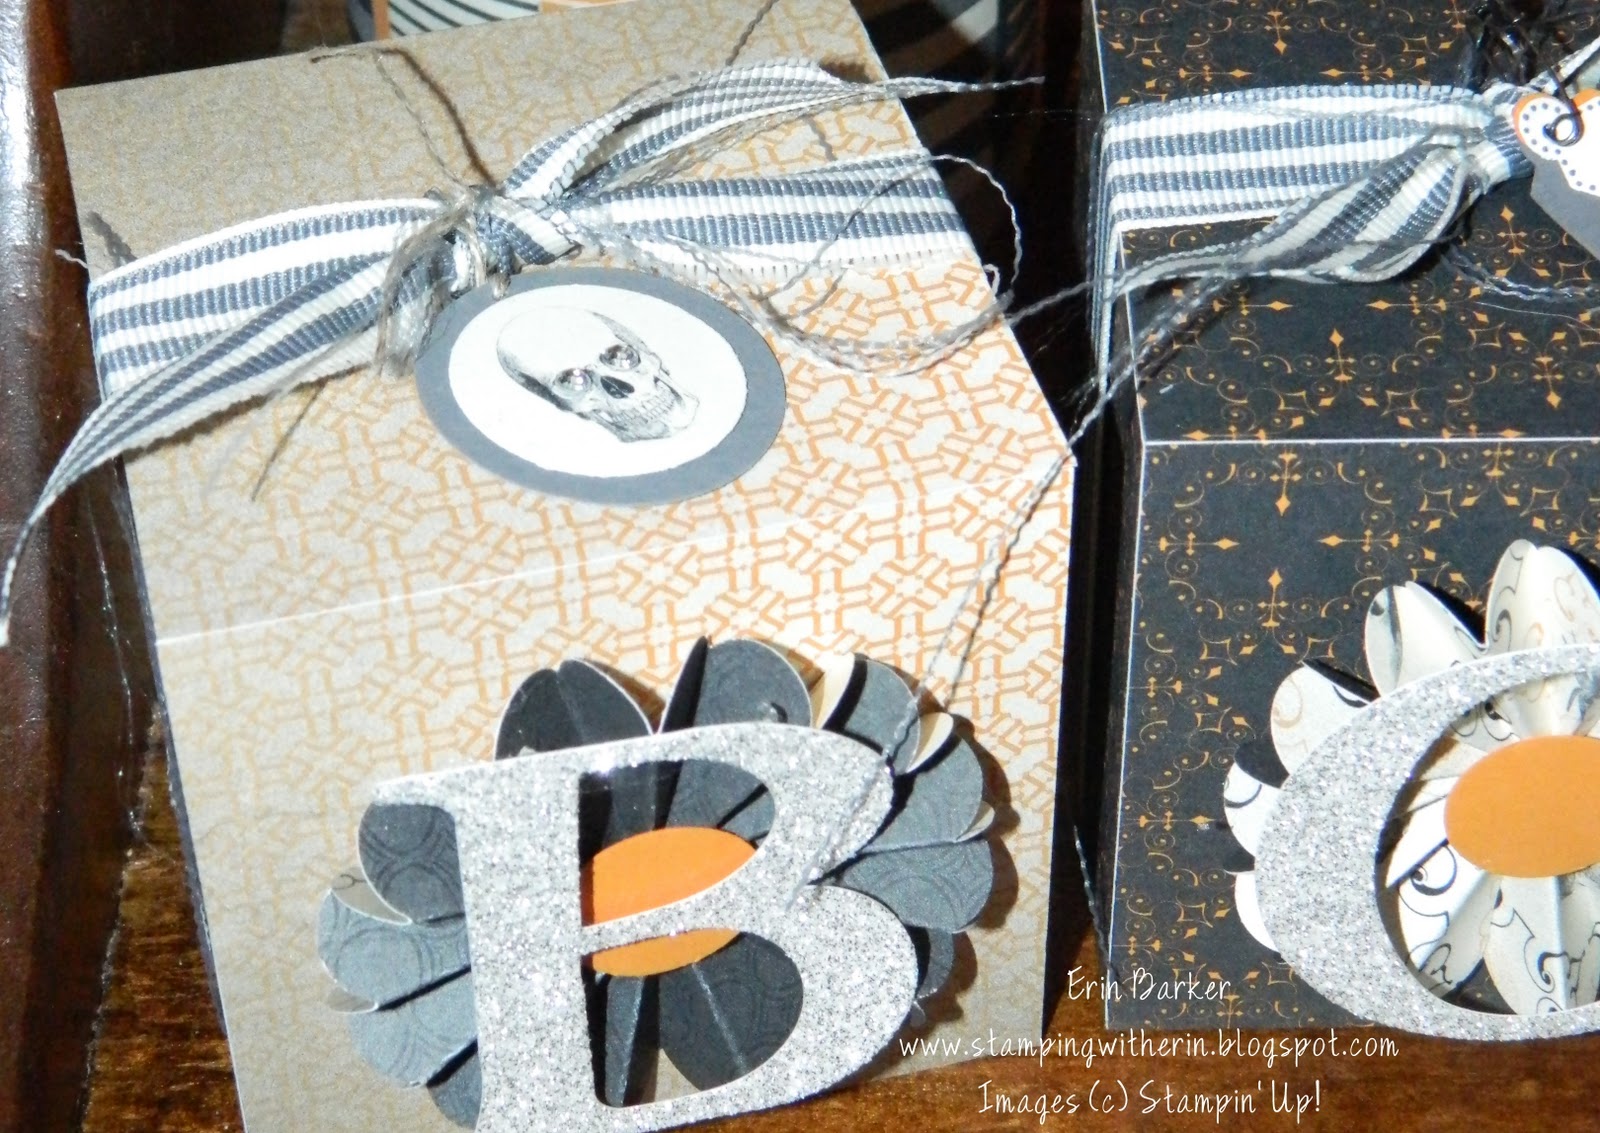
Using the Big Shot with the Petal Cone die (121810) and the Perfect Pennants die (123126) made it a breeze...so I made a couple of them and hung them on a branch that I spray painted black. It's hung with some fishing line on my curtain rod~ began thinking that it might be something I keep up through the holidays...picture a white branch with cute little handmade ornaments!! Right now they are empty but I plan on adding some sweet little treats as a Halloween gift to our neigbors.
If you don't have a Big Shot yet....there seriously has never been a better time to join Stampin' Up!...until October 31st...you can earn one FREE!!! Just click the promotional flyer on the right for more info.


This card shown was featured in a previous post...but since it wanted to be on our piano...and it didn't want to be lonely I made it a friend by covering a battery operated candle with matching Frightful Sight DSP (122351) and voila!! Here is a close-up:


Here is a banner that I made in about 10 minutes or less...seriously!! I used the same Frightful Sight DSP and the Perfect Pennants die (123126). Punched out letters with the Serif Essentials Alphabet die (113464).

The other side says 'WICKED'.....because I love witches and these little witch legs in my dining room are the cutest!!


Here I have covered three of our Decor Blocks (116829) in Pick Your Poison DSP (124001). The blocks are shown on pg. 181 in the Idea Book & Catalog. These were totally an inspiration from another demonstrator Donna Hill (thanks Donna!!). You get 4 smooth, MDF natural wood 3" blocks per package for only $9.95. I love these little guys...you could decorate them for all 4 seasons and turn them as needed or stack em'...B-A-B-Y would be cute for a baby shower...the possibilities are endless!!
I also just covered the candles with the same DSP...easy peasy!!
Here is a close-up:

I had mentioned that I had a 'really' cool Halloween card to share with you?? Well...don't worry...it's coming. I am actually in the process of making a video to show how it works...stay tuned!!

Here is one cute and simple idea for a quick treat~ 

I used our new Cellophane Bags (124134), some candy corn and made a tag. Then I just stuck it onto printed Whisper White CS with some glue dots.
Check out this site for lots of cute 'poop' poems..below is the one I used.
Pumkin Poop
I started to carve a pumpkin
With my carving knife and scoop,
But the pumpkin got so scared
That he took a little poop!
It looked so cute and funny
Just like a candy treat,
So I'm sharing it with you now
Because you are so sweet!

I think that might be it for Halloween decorations and ideas...need to get started on some Fall/Winter goodies~ Christmas will be here before you know it..isn't that crazy??

Do you all make your own cards for the holidays?? Leave a comment and let me know what are your traditions...past and present. In the last few years I have not mailed out any hand-made cards (I know...terrible huh??) One year I made about 50 or so and never even mailed them!!
Not the case this year...I have recently found my 'Stampin' Mojo' and the fingers are constantly inky!!

So stay tuned for continued inspiration and let me know if you have any questions!!
Happy Stampin'
~Erin

Wednesday, October 12, 2011

Apples, Leaves and Cajun Chicken pasta~ read on!!

So the other day I was in a mood to cook up somthin' good...where did I turn?? I ended up online checking out one of my favorites sites: the pioneer woman...ever heard of her?? If not..then I suggest you check it out now...well maybe after you enjoy reading this post. 

This is what I made~ YUM!!


It's called Cajun Chicken Pasta and my friends~ it was SO good!! Posting this picture is making me drool!
I seriously think that everything she makes is out of this world and well worth the mess in the kitchen!
The rules around here are: If you cook...you don't clean!!

Okay now on to some stampin'~ it's why your here right??

I promised some Halloween goodies and first and foremost..I don't want to disapoint anyone~

Here is our Simply Adorned jewelry...pg. 200 in the Idea Book & Catalog...at my next Stamp Camp we be making a total of 5 charm inserts for the 1"x 1 1/4" charm. I wanted to showcase how easy it is to change up the charms for any season or holiday..so here's Halloween's example (I'll post the others in a later post).
Here is the back:
I used the 24" chain (116800) and rectangle charm (116798) along with one of the trinket keys from a set of 4 (121892) and a black crystal bauble (121011).
Here is the bracelet:

The inserts were stamped and I LOVE how our new Pewter embossing powder (124114) matches PERFECTLY!!
Here is the other side of the bracelet:
Please note: If you have a nickel allergy these are a no go~ sorry!! However...these embellishments look GREAT on cards and other crafts!!
Please let me know if you have additional questions on the Simply Adorned collection.

Now on to more goodies..

It's fall right?? So do you think of Apples and Leaves?? Me too!!

This card features my newest favorite stamp set called Countryside(116998 W, 120495 C) this is a GREAT set for when you are needing more 'manly' cards. I came across so many great creations on http://www.splitcoaststampers.com/ but this is the card that I decided on for my inspiration...I needed one that didn't involve too much coloring because yup it's a Stamp Camp card...so the highlights on the truck were easy...Poppy Parade marker (119801) for the apples (these markers are a set of 5 for the 2010-2012 In Color Markers) and some white chalk (Stampin' Pastels 120962)~ LOVE IT!!
Card Details
Stamp Set: Countryside (116998 W, 120495 C),Woodgrain Background (117100 W), Tiny Tags (
Card Stock: Whisper White, Early Espresso, Poppy Parade
Ink: Early Espresso
Accessories: Stampin' Write Markers (Poppy Parade and Early Espresso), Stampin' Pastels (120962), Jewelry Tag punch (117190), Vintage Trinkets (118764), Frost White Shimmer Paint (116854), Early Espresso 1/8" taffeta ribbon (119959), Color Spritzer tool (107066)


This next card came to me so quickly...don't you love it when that happens?? I have been off work the past four days  and the ideas and have been flowin'..what do they call it?? Stampin' Mojo??
Again a great 'man' card if needed, but I don't know...it's pretty too!! The insides of both cards I have left blank because I don't know which sentiment I want to use yet...but they will probably both use stamps from Curly and Cute (117014 W, 120510 C).  This is the first time I have used this denim ribbon...where has it been all my life?? Oh yeah~my stampin' closet!! I love it~ it really does look and feel like blue jeans!!
Here is a close-up:
I knew that I wanted to use a stick...plane and simple a stick...so I ventured outside in the rain and stood under a big ol' Oak tree to look for some small dry twigs...I quickly learned I was under attack..squirrels in the tree were dropping acorns all over the place!!
Now check this out...
'BABY' acorns...aren't these the cutest things you have ever seen?? My mind is now racing on what crafty thing I can do with these little guys!!

Card Details
Stamp Set: French Foliage (120845 W, 121166 C)
Card Stock: Soft Suede, Very Vanilla, Cajun Craze
Ink: Soft Suede,  Versamark pad (102283)
Accessories: sponges (101610), blue denim jean ribbon (125053), mini vintage tags (118763), heat tool (100005), pewter embossing powder (124114), champagne mist shimmer paint (116806) and a twig!
That's it for today, thanks for stopping by!!
Happy Stampin'
~Erin

Thursday, October 6, 2011

'Boo'!! Did I scare you??


Here is what is hanging above my stampin' desk~ totally inspired by Kimberly's beautiful creation shown here...mine is nowhere close to her beauty but it makes me smile!! I love this DSP called Frightful Sight(122351). I think I have gone through two packs already...the colors are just awesome for Halloween and the polka dotted background pages can be used for so many things besides Halloween.

Here is a close-up of what I did to two of the spiders...
did you notice that this little guy only has 6 legs?? I think that may have been an oversight~ he still looks like a creepy little spider!! I took a small piece of our White Baker's Twine (124262) and un-twisted it to get just one string. Poked a hole in the CS and taped it from the back. It's also secured under the CS at the top to make it look like he's just hangin' around.

Using the same DSP I made a Halloween card too. I also grabbed some of the sparkly Glimmer Paper (124005) in silver~ this paper is BEAUTIFUL!!!

The card base is Cajun Craze CS, embossed with the Perfect Polka Dots embossing folder (117335). Added some Basic Black 5/8" satin ribbon (117285). I embossed the greeting using the Scaredy Cat stamp set (122555 W, 122557 C) with Basic Black Craft ink (102192) and clear embossing powder (109130)...stamped it again onto Whisper White CS, cut the little ghost out and stuck him on with a dimensional (104430).


Here is a close-up of the little ghost~
Lastly, here is a cute little 3-D item for you.

Inside the witch's hat is a small Reeses cup. This idea came from Wendy (I think like 3 years ago!!). I tweaked mine just a bit~ but you'll get the idea. The bottom of mine uses the 2 1/2" circle punch (120906).

The Halloween card, witch hat and the 'Give Thanks' Diorama card in this post are the goodies that were created for my last Stamp Camp. Over the weekend I will be posting some more Halloween goodies including 3-D treats, home decor and a really cool Halloween card!! Stay tuned!!

Have a great day!
~Erin

Monday, October 3, 2011

Shamrock Stampers Downline Meeting Goodies

First and foremost...now is a GREAT time to join Stampin' Up!~ check this out!!!


If you sign up to be a Stampin’ Up!® demonstrator in October, you’ll get a FREE Big Shot. And if you already have a Big Shot, how about $100 in FREE product? Yep, that’s right! So if you’ve been looking for an opportunity to do what you love, while getting a 20 discount on your favorite products, now is the perfect time! Use the Big Shot die-cutting machine and Stampin’ Up!’s exclusive dies (sold separately) to create uniquely beautiful projects in a flash!!

In addition, the new-demonstrator Starter Kit–a steal at just $175–contains over $345 worth of stamp sets, card stock, ink, accessories, and business supplies-everything you need to start your new business.
Don't hesitate to ask me any questions you may have to join...it has been almost 10 years since I signed up and I am truly thankful for all my stampin' memories!! I was recently able to create an 'official' Stampin' Up! Group...we are called the 'Shamrock Stampers' and I would love for you to join our group!!

Lastnight we enjoyed a 'Shamrock Stampers' Downline meeting and after a quick discussion and MDS video we got down to stampin'. At this meeting I asked those that were interested to sign-up for a Holiday Themed Shoebox Swap. Here is the card I created:

It's a very easy 'quilt' card made using our new Holly Berry Bouquet DSP (124004) and 1" square punch (124094). So here is how I created mine~
Punch out a total of 20 squares and lay them out as a 'dry' run till you are happy with your quilt design. Then adhere to a piece of CS that measures 4"x5". I covered my entire sheet of CS with adhesive from our gluestick..made it SO easy to apply the squares. If you don't have our gluestick..then be sure to add it to your next order (104045). You get two of them and they seriously are the best!! Then center that piece over your Top Note die (113463) and cut out. Then I embossed it using the Snow Burst embossing folder (124096). Not done yet...now to finish it up I added some yummy 3/8" velvet Very Vanilla trim (125637), linen thread (104199), mini jingle bells (124116), and hand-made tags.

Lots of these goodies are from the current Holiday Mini Catalog. Man...it makes me so excited for the upcoming months. These toys are so fun to play with and creating these cards and gifts make me SO happy!!

Here is the inside:
It's a quilt right?? Warmest of Wishes?? Get it?? Oh.. sometimes I amuse myself .
This set is the Hostess set from the Holiday Mini (you can earn it FREE!). Here I stamped it with Early Espresso ink and embossed with clear embossing powder. The last thing I did and it's hard to tell from the photos...is 'spritzed' it with Vanilla Shimmer Smooch Spritz (118772). Oh wait...almost forgot the envelope! I 'spritzed' it too and stamped the front with Pines & Poinsettias (123762 W), (123764 C) ...which matches this paper perfectly!!!

Here is the card that Beth designed:   

It uses the Snowflake die (113460) and a Cherry Cola can~ cute huh?? Used the same embossing folder as noted above, added one of our glimmer brads (121003) then sprayed the whole card (inside and outside) with Champagne Mist Shimmer Paint (116806). Here is the inside:


Order your Personsalized stamp (pg. 172 in the Idea Book & Catalog) today to make those Holiday cards FAST!! It's 'short, sweet and right to the point'!

Here is Jean's card:
I had SO much fun making this card, it wasn't that it was difficult...just a bunch of steps...but the end result was SO worth it...can't you feel the warmth from the flames?? It was also the first time that I used our new Mica Flakes (124115) these little flakes are sure pretty..but if you don't like glitter or Easter grass...you may not likey...just sayin'.
 Here is the inside:
Thought it was perfect...maybe he wants to come down my chimney!!  Be sure to check out her blog for additional details.

This last card is Anne's with a dash of me... I changed mine a little. I didn't get a photo of hers...but have asked her to send me one and I will post hers as soon as I get it. 
The window was created using our 1 3/8" square punch (119877). Wouldn't it be great if Stampin' Up! made a die for this?? Behind that is a piece of vellum VS and I stamped the image in going gray, then flipped it over...notice how the image is different than in the catalog?? It looks more faded in person as if you are truly looking into a window...added some more Mica (aka snow). The faux wreath was made with Always Artichoke CS and our 2 3/8" scallop punch (118874) and 1 3/8" circle punch (119860). I embossed it with the Snow Burst embossing folder (124096) and added a Real Red 1/8" taffeta bow (119251). The last wintery step was spraying it with Frost White Shimmer Paint (116854).
Here is a close-up of the wreath:
 
Here is the inside of the card:


That's it for Christmas...now back to Halloween!!! Here in Virginia the weather sure seems like the holidays are upon us...it's FREEZING~ the heat has been on the past few days and the sunshine has vanished. Outside it's rainy, raw and wet..YUCK!! It's nice to stay inside and stamp the day away. I have lots of projects to share with you and since I'm off from work..I am taking advantage of my free time!! Here is a project that Anne made...I would love to take the credit but I just wouldn't have the patience to make this topiary.


Here is close-up:

She punched out about a million or so of the Blossom Triple Layer Punch (122464) and added cool little spiders using the Scaredy Cat stamp set (122555 W, 122557 C) then to make the bodies look 3-D here is a cool little trick~ color our Basic Rhinestones (119246) with a black Sharpie marker and ta-da....isn't it AMAZING?? 

Lastly here is what I made for my downline members who attended the meeting:

It's a box made using our Bitty Box & Envelope Die (115967) and Basic Black CS. The topper was made with the Pick Your Poison DSP (124001) and no...I did not use the Piece of Poison stamp set...because I forgot to order it (OOPS!) but I punched out the skeleton heads from one of the pieces of paper and 1" circle punch (119868) layered onto 1 1/4" circle punch (119861). Love those rhinestone eyes!!!
Inside:

.... a 'spooky' little hair clip.


Here is the back...I hot glued a 3/4" circle (119873) punched piece of CS to the back and then to the barrett.
This was really easy to make:
Details: satin fabric and tulle (is that how you spell that??)
Cut out circles using the Circles # 2 die (114526). My layers were:
-largest circle- 2 black, 1 orange
-2nd largest circle- 2 black, 1 orange
-3rd largest circle- 1 black
 Then you just heat with the heat tool (100005). I sewed them all together with the skeleton button and that's it!! I also sprayed mine with the Champagne Mist Shimmer...man I use that stuff on EVERYTHING!!
Told you it was easy!!
SO... just think you too can make all of these great projects quickly with our BIG SHOT!!! Join today!! Or...you can just buy one shopping (24/7) on my website .

Happy Stampin'
~Erin

Monday, September 26, 2011

Finally~ I made my first Diorama Card!!

Here is one of the cards that will be made at my upcoming Stamp Camp this Friday...it's called a Diorama 'box' card. Click here for the tutorial I followed by Dawn (gotta love her!!) I was always so intimidated to try one...because it looked so involved but I was amazed at exactly how simple it was!! So take a look and try it out for yourself!!

Here is an angled view to see the layers:

I began thinking how cute these would be as individual place settings on the table for Thanksgiving~ you could easily create personalized names printed with MDS (My Digital Studio). Great party favors...etc.


Details:
Card Stock: More Mustard, Very Vanilla and Spice Cake DSP (124003)
Stamp Sets: Gently Falling (123802 W, 123804 C) Hand-Penned Holidays (124310 W, 124312 C)
Ink: More Mustard, Soft Suede
Accessories: Linen Thread (104199) , Spice Cake Designer Buttons (124113), 1 1/4" circle punch (119861), 1 3/8" circle punch (119860), sticky strip (104294), glue dots (103683), Soft Suede Stampin' Write marker (120973), Color Spritzer Tool (107066)

Did you notice that I used those big ol' buttons AGAIN?? I'm on my third pack!! LOVE em'~ make sure you order yours before they are gone or before I buy them all!!
Please note: I used a retired Very Vanilla envelope for this card because my OCD was making me twitch...we now only offer the Small Open-End Envelopes in white (107286)...this size envelope is perfect for for this style of card.

Please let me know if you have any questions!! Have a great day!
~Erin

Thursday, September 22, 2011

Sunflowers anyone??

As soon as I saw this stamp from Stampin' Up!...duh calledSunflower (123606) I knew it was a MUST have stamp!! Today was actually the first time I used it since ordering it back in July...oops!! Shame on me ~ too many stamps...too little time!!

Another must have are these buttons...since my previous post I have used them on two other projects...if they were edible I would eat 'em!!

My inspiration came from the pin. I bought the pin from this cute little country shop with the intentions that I would try to re-create it using our dies, some felt and a stick. Sounds simple huh?? Well..speaking of not having any time to stamp...like I have the time to try to create another beauty like this one...SO now I have it as a cute little gift!
Note: Hard to tell from the photo but the edges of the base card were sponged with the Early Espresso and the big ol' button was 'faux' sewn using the same string from the Mini Vintage Tags..stuck on with glue dots. The sunflower was stamped and embossed using clear embossing powder and sprayed with the color spritzer tool and Early Espresso Marker.
Card details:
Card Stock: Kraft, Early Espresso, More Mustard
Stamps: Sunflower (123606) and Tiny Tags (118091 W, 118592 C)
Ink: Early Espresso, Versamark pad (102283)
Accessories: 1/4" grosgrain ribbon (I think it's retired Always Artichoke), Mini Vintage Tags (118763), sponges (101610), glue dots (103683), heat gun (100005), clear embossing powder (109130), Dotted Scallop Ribbon border (119275), Spice Cake Designer Buttons (124113)

Pocket Gift Holder:
Card Stock: Early Espresso, Very Vanilla, More Mustard
Stamps: Sunflower (123606), Creatively Yours (122610 W, 122612 C)
Ink: Early Espresso, Versamark pad (102283)
Accessories: 1/4 grosgrain ribbon, Big Shot (113439), Petite Pocket (123131), Scallop Edge Border punch (119882), 1 3/8" circle punch (119860, 1 3/4" circle punch (119850), clear embossing powder (109130)
Note: After I assembled the pocket die, I trimmed the top so that the flap measured 1" from the score line and punched the edge using the Scallop Edge Border. Oh...and I almost forgot that I spritzed the 'hand-made ' tag with the Champagne Mist Shimmer paint to match the Vintage tag on the card. It's hard to see that since the flash really washes it out from my camera~ but it's there I swear!! So pretty in person!!
That's about it!!
Here is a view of the back:
Let me know if you have any questions!! Thanks and happy stampin'!
~Erin

Tuesday, September 20, 2011

You getting ready for Halloween?? So many things to share with you....where to begin??


First of all I wanted to share my swap card from Convention this past July. It is called a 'Waterfall Card'. Click here for a tutorial. I had signed up for a 'WOW' swap and 'wow'..what was I thinking?? I ended up making 122 of them!! This is what 122 of them looked like~

I decided on a Halloween themed card WAY back in July because it's my favorite holiday!!

This took some time and quite a bit of card stock!!  Oh well..when I saw the goodies I got back it was all worth it. Here is what the 'waterfall' card looks like as it's opened...cute huh??


There were other swaps that I joined and I'll share those with you in a later post. But here is a quick and cute idea using our new Spice Cake fabric (124066), Designer Buttons (124113) and Spice Cake DSP (124003) all found in our Holiday Mini Catalog. Have you checked out the current Mini Catalog?? LOVE IT!!

There are so many cute goodies,I honestly don't know where to begin. I had an idea of what I needed to make for a co-worker...I made her a CD and since she knows that I am a demonstator..I had to make it cute...


Here I have used the DSP for the inside cover and decorated it with a flower made from the Fun Flowers die (121812) and Big Shot (113439).
Hint: to get the crinkly effect..spray each layer of your flower with water and scrunch it up into a ball in your hand. Open it carefully, let them dry and layer as desired. I attached with brad and hot-glued a big ol' button on top threaded with some hemp twine (100982). Notice that gorgeous striped grosgrain ribbon?? That is one of my favorite ribbons....cut it down the center and pull at it to get it frayed and all shabby lookin'~ love that style...you can't mess it up!! Everything looks all pretty... all grungy and vintage like!!

The stamp set that I used here is called Friends Never Fade (118750 W, 120618 C). I stamped it with Soft Suede  and embossed it with clear embossing powder (109130).
Oh...forgot to mention and it's hard to tell in the photos but it's oh so pretty in real life~ but all of it was spritzed with the Champagne Mist Shimmer Paint (116806). Ask me if you need directions on that one...it's awesome on about EVERY project!! The kids are probably afraid I'll start 'spritzing' them before school!!
Here is the inside: I used the Creatively Yours stamp set (122610 W, 122612 C) and did the same as above, punched it out with the extra-large oval punch (119859). Along with the CD I made a cute pin and coordinating box...  the pin was made using the same die and read somewhere a cool technique...spread your fabric layers out onto a piece of printer copy paper. Spray with starch (I used heavy duty fabric stiffener) and wad into a ball within the paper. Then carefully unroll the paper and let the fabric flower layers dry completely and layer as desired. I used a total of 9 layers, 3 of each pattern. I poked a hole in the center using our paper-piercing tool (116631) and added a Very Vanilla 5/8" brad (112533).

So...how did I make the box?? I used the Big Shot and my favorite Petal Cone die (121810). Click here for a great tutorial using this die but altering the die cut shapes into a cute little Take-Out box. I then embossed the box with the Vintage Wallpaper embossing folder (120175), spritzed with some shimmer and added some striped grosgrain ribbon~voila!!


Here is a close-up of the pin...


 and back.

If you have any questions on anything you have seen here, please don't hesitate to ask!! Until next time...happy stampin'!

~Erin
Blogging tips