Monday, September 26, 2011

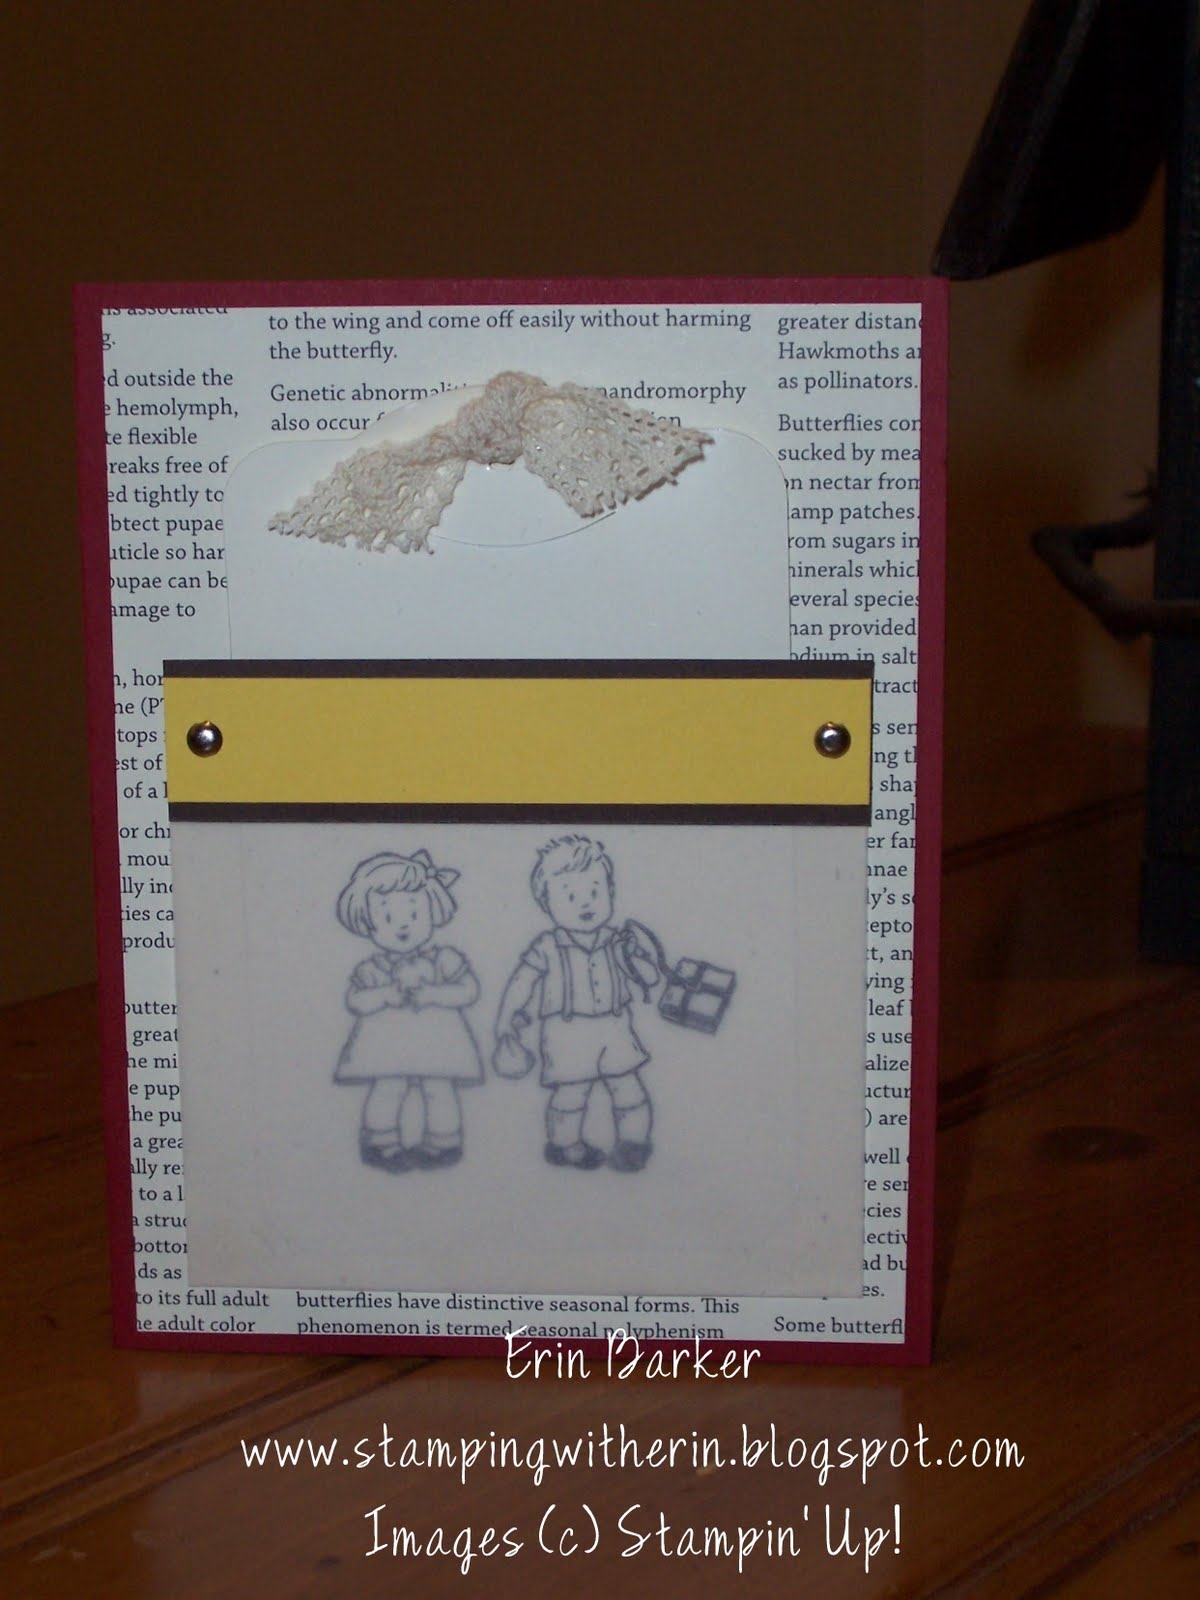
Finally~ I made my first Diorama Card!!

Here is one of the cards that will be made at my upcoming Stamp Camp this Friday...it's called a Diorama 'box' card. Click here for the tutorial I followed by Dawn (gotta love her!!) I was always so intimidated to try one...because it looked so involved but I was amazed at exactly how simple it was!! So take a look and try it out for yourself!!

Here is an angled view to see the layers:

I began thinking how cute these would be as individual place settings on the table for Thanksgiving~ you could easily create personalized names printed with MDS (My Digital Studio). Great party favors...etc.


Details:
Card Stock: More Mustard, Very Vanilla and Spice Cake DSP (124003)
Stamp Sets: Gently Falling (123802 W, 123804 C) Hand-Penned Holidays (124310 W, 124312 C)
Ink: More Mustard, Soft Suede
Accessories: Linen Thread (104199) , Spice Cake Designer Buttons (124113), 1 1/4" circle punch (119861), 1 3/8" circle punch (119860), sticky strip (104294), glue dots (103683), Soft Suede Stampin' Write marker (120973), Color Spritzer Tool (107066)

Did you notice that I used those big ol' buttons AGAIN?? I'm on my third pack!! LOVE em'~ make sure you order yours before they are gone or before I buy them all!!
Please note: I used a retired Very Vanilla envelope for this card because my OCD was making me twitch...we now only offer the Small Open-End Envelopes in white (107286)...this size envelope is perfect for for this style of card.

Please let me know if you have any questions!! Have a great day!
~Erin

Thursday, September 22, 2011

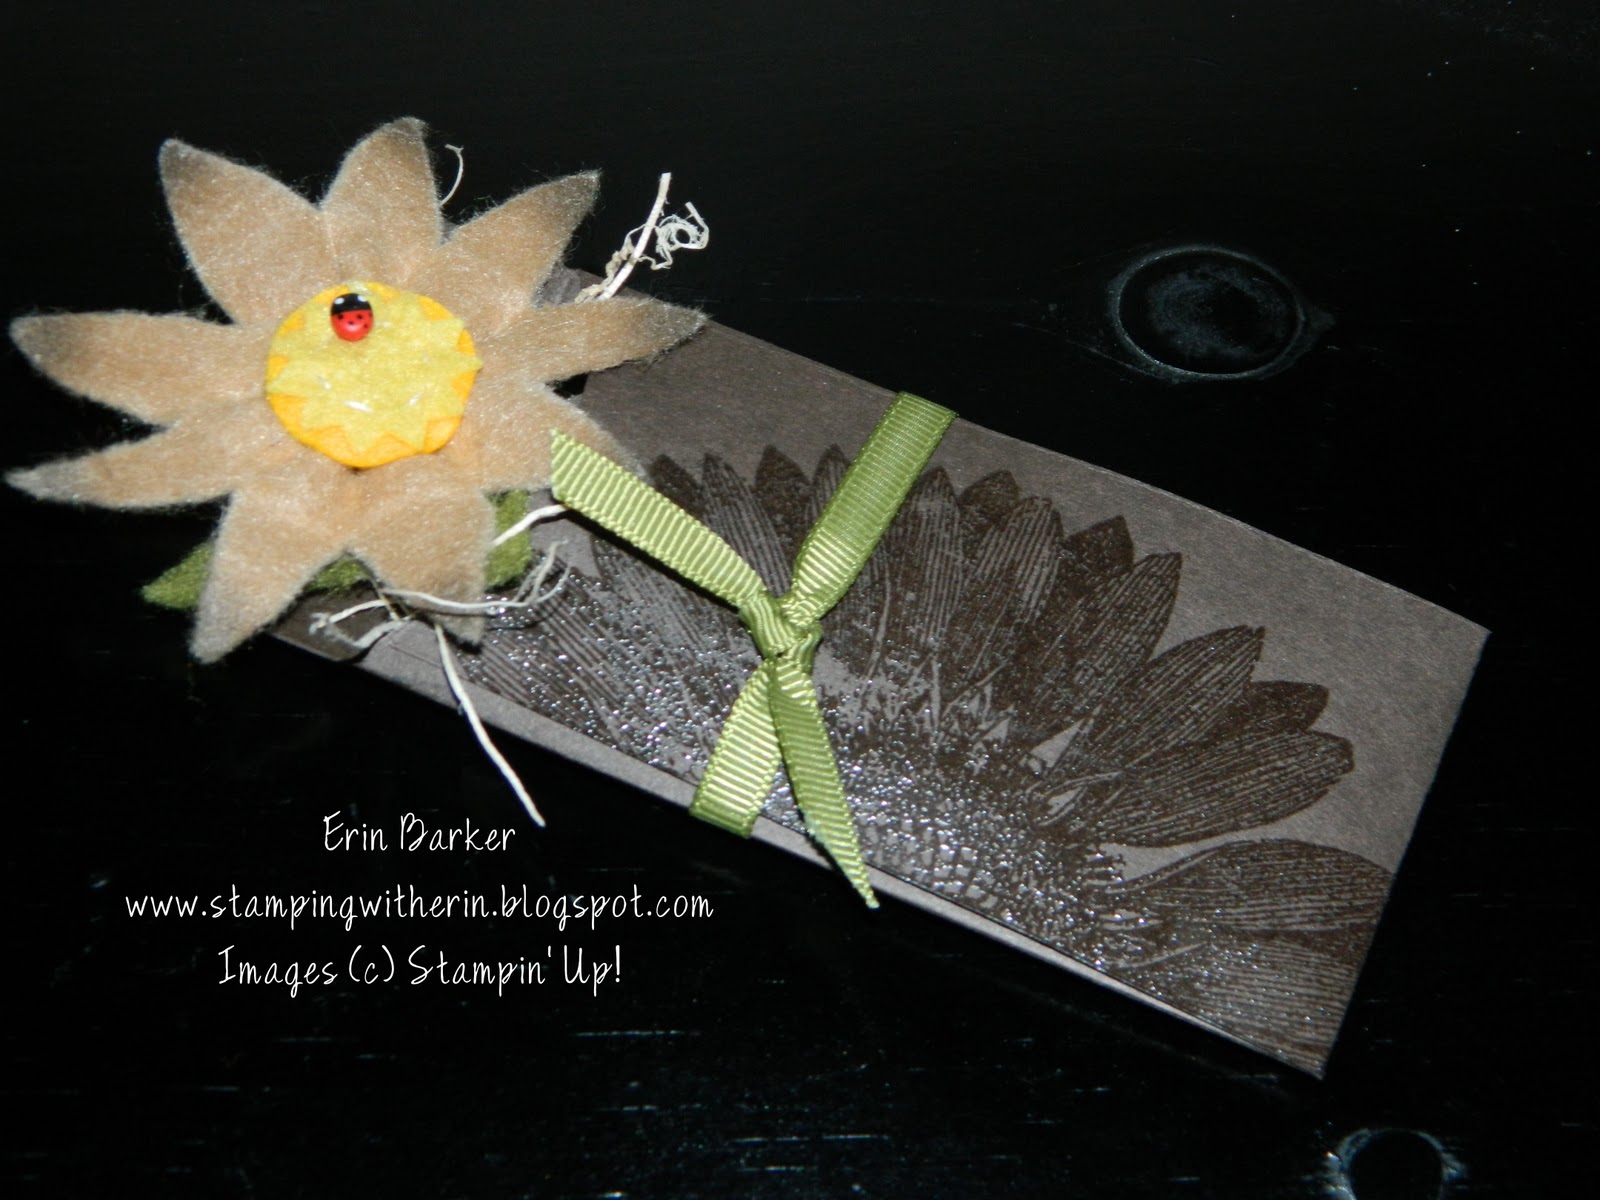
Sunflowers anyone??

As soon as I saw this stamp from Stampin' Up!...duh calledSunflower (123606) I knew it was a MUST have stamp!! Today was actually the first time I used it since ordering it back in July...oops!! Shame on me ~ too many stamps...too little time!!

Another must have are these buttons...since my previous post I have used them on two other projects...if they were edible I would eat 'em!!

My inspiration came from the pin. I bought the pin from this cute little country shop with the intentions that I would try to re-create it using our dies, some felt and a stick. Sounds simple huh?? Well..speaking of not having any time to stamp...like I have the time to try to create another beauty like this one...SO now I have it as a cute little gift!
Note: Hard to tell from the photo but the edges of the base card were sponged with the Early Espresso and the big ol' button was 'faux' sewn using the same string from the Mini Vintage Tags..stuck on with glue dots. The sunflower was stamped and embossed using clear embossing powder and sprayed with the color spritzer tool and Early Espresso Marker.
Card details:
Card Stock: Kraft, Early Espresso, More Mustard
Stamps: Sunflower (123606) and Tiny Tags (118091 W, 118592 C)
Ink: Early Espresso, Versamark pad (102283)
Accessories: 1/4" grosgrain ribbon (I think it's retired Always Artichoke), Mini Vintage Tags (118763), sponges (101610), glue dots (103683), heat gun (100005), clear embossing powder (109130), Dotted Scallop Ribbon border (119275), Spice Cake Designer Buttons (124113)

Pocket Gift Holder:
Card Stock: Early Espresso, Very Vanilla, More Mustard
Stamps: Sunflower (123606), Creatively Yours (122610 W, 122612 C)
Ink: Early Espresso, Versamark pad (102283)
Accessories: 1/4 grosgrain ribbon, Big Shot (113439), Petite Pocket (123131), Scallop Edge Border punch (119882), 1 3/8" circle punch (119860, 1 3/4" circle punch (119850), clear embossing powder (109130)
Note: After I assembled the pocket die, I trimmed the top so that the flap measured 1" from the score line and punched the edge using the Scallop Edge Border. Oh...and I almost forgot that I spritzed the 'hand-made ' tag with the Champagne Mist Shimmer paint to match the Vintage tag on the card. It's hard to see that since the flash really washes it out from my camera~ but it's there I swear!! So pretty in person!!
That's about it!!
Here is a view of the back:
Let me know if you have any questions!! Thanks and happy stampin'!
~Erin

Tuesday, September 20, 2011

You getting ready for Halloween?? So many things to share with you....where to begin??


First of all I wanted to share my swap card from Convention this past July. It is called a 'Waterfall Card'. Click here for a tutorial. I had signed up for a 'WOW' swap and 'wow'..what was I thinking?? I ended up making 122 of them!! This is what 122 of them looked like~

I decided on a Halloween themed card WAY back in July because it's my favorite holiday!!

This took some time and quite a bit of card stock!!  Oh well..when I saw the goodies I got back it was all worth it. Here is what the 'waterfall' card looks like as it's opened...cute huh??


There were other swaps that I joined and I'll share those with you in a later post. But here is a quick and cute idea using our new Spice Cake fabric (124066), Designer Buttons (124113) and Spice Cake DSP (124003) all found in our Holiday Mini Catalog. Have you checked out the current Mini Catalog?? LOVE IT!!

There are so many cute goodies,I honestly don't know where to begin. I had an idea of what I needed to make for a co-worker...I made her a CD and since she knows that I am a demonstator..I had to make it cute...


Here I have used the DSP for the inside cover and decorated it with a flower made from the Fun Flowers die (121812) and Big Shot (113439).
Hint: to get the crinkly effect..spray each layer of your flower with water and scrunch it up into a ball in your hand. Open it carefully, let them dry and layer as desired. I attached with brad and hot-glued a big ol' button on top threaded with some hemp twine (100982). Notice that gorgeous striped grosgrain ribbon?? That is one of my favorite ribbons....cut it down the center and pull at it to get it frayed and all shabby lookin'~ love that style...you can't mess it up!! Everything looks all pretty... all grungy and vintage like!!

The stamp set that I used here is called Friends Never Fade (118750 W, 120618 C). I stamped it with Soft Suede  and embossed it with clear embossing powder (109130).
Oh...forgot to mention and it's hard to tell in the photos but it's oh so pretty in real life~ but all of it was spritzed with the Champagne Mist Shimmer Paint (116806). Ask me if you need directions on that one...it's awesome on about EVERY project!! The kids are probably afraid I'll start 'spritzing' them before school!!
Here is the inside: I used the Creatively Yours stamp set (122610 W, 122612 C) and did the same as above, punched it out with the extra-large oval punch (119859). Along with the CD I made a cute pin and coordinating box...  the pin was made using the same die and read somewhere a cool technique...spread your fabric layers out onto a piece of printer copy paper. Spray with starch (I used heavy duty fabric stiffener) and wad into a ball within the paper. Then carefully unroll the paper and let the fabric flower layers dry completely and layer as desired. I used a total of 9 layers, 3 of each pattern. I poked a hole in the center using our paper-piercing tool (116631) and added a Very Vanilla 5/8" brad (112533).

So...how did I make the box?? I used the Big Shot and my favorite Petal Cone die (121810). Click here for a great tutorial using this die but altering the die cut shapes into a cute little Take-Out box. I then embossed the box with the Vintage Wallpaper embossing folder (120175), spritzed with some shimmer and added some striped grosgrain ribbon~voila!!


Here is a close-up of the pin...


 and back.

If you have any questions on anything you have seen here, please don't hesitate to ask!! Until next time...happy stampin'!

~Erin

Friday, September 2, 2011

Holiday Mini Catalog is here!!!!!


Can you believe it??? I have been waiting for this day~ being a demonstrator I had the privelidge of ordering early and have been playing with some of the new goodies....wait until you see my creations!! But now you too are able to order and get ready for the holidays. What do you like best about the holidays??

I LOVE the fall colors, food and spending time with family and friends. I think my favorite holiday is Halloween...I actually started decorating around the house 2 weeks ago...and you will soon see why. My poor kids think their momma has lost it...I bought a tree (a very primitive tree....it looks burnt!!) While I was putting it together Aiden (my youngest) asks "It's Christmas already??" I said..."No silly...this tree is brown..it's to celebrate Fall!". Of course..this was still in the month of August and the kids had not even returned back to school~silly me!!

If you have any questions on anything you see in the Holiday Mini Catalog, please don't hesitate to ask...I bought pretty much verything in there..and there are some COOL new tools to play with!!

Let me introduce you to Simply Scored (a scoring board)...LOVE IT!!
Details:
The Simply Scored Scoring Tool’s base fits paper or card stock up to 12" x 12" and features score tracks every 1/8". Features two easy-to-read rulers (with inch markings down to 1/8") along top and left side for perfect scoring. (One standard left-to-right ruler and one zero center ruler). Includes three moveable tabs and stylus. Bottom has non-marking, no slip feet. Measures approx. 15 1/8"x 13 1/4"x1"
Over the weekend as I finish my Halloween decor... I will show you what I made....but here is an up close sample of scored paper medallions made by Stampin' Up!...isn't it beautiful??
Happy Stampin'
~Erin

Thursday, August 11, 2011

'Good-bye' Summer....'Hello' Fall!!

So many goodies to share with you today...first and foremost here are the projects that we will be making at my next Stamp Camp: This Friday (August 12, 2011 7-9pm) Click here for other upcoming scheduled events. If you have already seen the new Idea Book & Catalog then you know about all the new accessories and stamps..one of my latest favorites is the 3/8" ruffled ribbon!! Just sitting on the spool it looks so pretty!!   

This is a 'good-bye' to summer card: Love the colors...so bright and cheery!! It uses the level 2 hostess set in the Summer Mini Catalog Love & Care..it's a really fun set I created so many cards it was hard choosing which one to demonstrate!! Had to go with this one because it uses my favorite ribbon!!
Card Recipe:

Stamp Set: Love & Care (123020 W, 123022 C)
Card Stock: Whisper White, Calypso Coral
Ink: Calypso Coral (marker), Daffodil Delight, Melon mambo, Temting Turquoise, Old Olive (marker)
Accessories: Floral Fusion Sizzlits (115969), Scallop Edge Border punch (119882), basic rhinestones (119246), Designer Frames embossing folder (123130), glue dots (103683), Calypso Coral 3/8" ruffled ribbon (122976)


 Don't forget to stamp the back of your cards to let the recipient know you made them with love: this uses our new Angel Policy stamp set called Creatively Yours (122610 W, 122612 C).

Next are my 'hello' to fall goodies:
This card I received as a 'WOW' swap at Convention. Let me tell you...I was completely 'WOWED'!! It is called a Magic Color Card...and now you will see why...

View closed


View open

I know...isn't it AMAZING??  It comes from a fellow demonstrator Teresa Evangelista in Florida, I contacted her to see how she came up with this beauty because it is such and awesome technique!! (Thanks for the incredible inspiration Teresa!!) The tag was made using Sizzix Big Shot (113439) and Two Tags die (115954)..there is a trick too on how to avoid the score lines on the die...mark on the side where the fold is (I used our white Signo gel pen (105021)). Then roll the die into the Big Shot as you normally would but don't go all the way through...stop at the line you drew and back out...turn the die around and do the other side. Then use your paper snips to cut it out...GENIOUS!! I am thinking about making a video tutorial but with her permission..so I'll let you know!!
This is perfect for 'back-to-school'..my kids head back on August 24th.... Do you remember the commercial...where the dad is singing "It's the most wonderful time of the year!" I honestly have mixed emotions about it~ last month I decided it was time to go back to work since the kids are getting older. I have spent the last 13 years as a a SAHM and LOVED every moment!! So now during the days that I am at work I miss them terribly!! The last two days I was scheduled off and I have caught up on the laundry...gotten ready for tomorrow's Stamp Camp and cleaned the house...now it's time to relax with the kids and do some school shopping!!

Card Recipe:
Stamp Set: Greeting Card Kids (119887 W, 120633 C)
Card Stock: Cherry Cobler, Very Vanilla, Vellum, Daffodil Delight, Early Espresso, Naturals Ivory, First Edition DSP (121878)
Ink: Staz -On black, Stampin' Write markers: Real Red, More Mustard, Not Quite Navy, Daffodil Delight, Early Espresso, Crumb Cake
Accessories: silver brads (104336), window sheets (114323), Victoria crochet trim ribbon (118481), paper-piercing tool (116631) and mat pack (105826).

                 
Lastly is this decorated Fancy Favor box, made with the Fancy Favor die (115965) for the Sizzix Big Shot. Here is an image of the side:

The flower was created using the ornament punch (119847).


 My downline Anne Butterfield made/cased this cute little rose box using the same ornament punch and hand-created box. She sponged the edges to add dimension and it's BEAUTIFUL in person!!


Side view
Both are similar, hers used more petals which created a fuller flower....now here is a CUTE idea~ before I attached mine to the box, it was laying flat on the table..I thought about how cool it would look holding a tealight candle in the middle?? The possibilities are endless. Not sure if you can tell from the photo but the entire flower was spritzed with rubbing alcohol and the Champagne Mist shimmer paint (116806) this stuff makes everything prettier. I added an Antique brad (117273) to the center of a 1" circle punch (119868) and popped it up with dimensionals (104430). Hint: both the flower and box are held together using sticky strip (104294)...it is a must-have adhesive when creating 3-D projects.

That's about it for today, as summer comes to and end think about what the upcoming months have in store... Halloween, Thanksgiving...and Christmas!!! The next Holiday Mini catalog has SO many cute things to get your creative juices flowing...it's so exciting sitting here thinking about all the goodies I'm planning on making so stay tuned!!
Take care,
Happy Stampin'
~Erin

Sunday, July 31, 2011

Today is the last day to sign-up with our FABULOUS promotion!!! If you have contemplated joining Stampin' Up! then check out the above video, Shelli Gardner has announced that she will be making a video tutorial and we can watch and stamp right along with her making a CUTE Holiday Keepsake box!

Join for the discount and be your best customer or for just $99 start your own business today!!
If you have any questions about joining, please contact me today, I would love for you to become part of my team Shamrock Stampers!!
Stampin' hugs~
Erin

Later today I will be posting LOTS of goodies from my recent trip to SLC Utah 2011 Convention...stay tuned!!

Friday, July 1, 2011

The new 2011-2012 Idea Book & Catalog is here!!

The day has arrived....it's here!!! If you have not yet received your copy of this beauty contact me today!! Click here to view online. My 'Wish List' is growing my the minute..too many cute things I want/need!! If you are interested in hosting a workshop then now is the time...there is a new hostess program where you can even earn merchandise 1/2 off!!
I have been busy working on all my swaps for Convention in SLC, Utah!! I can't wait to come back and share my experience. Three members of my downline group 'Shamrock Stampers' are joining me and it is going to be a blast!!
Want in on all the fun?? Announced today is a $99 Starter Kit Promotion and along with the Starter Kit contents you will get a FREE Christmas Keepsake Project Kit ($40 value).
Isn't it cute??
Contact me today if you have any questions!!
Happy Stampin'
~Erin
Blogging tips