Friday, September 2, 2011

Holiday Mini Catalog is here!!!!!


Can you believe it??? I have been waiting for this day~ being a demonstrator I had the privelidge of ordering early and have been playing with some of the new goodies....wait until you see my creations!! But now you too are able to order and get ready for the holidays. What do you like best about the holidays??

I LOVE the fall colors, food and spending time with family and friends. I think my favorite holiday is Halloween...I actually started decorating around the house 2 weeks ago...and you will soon see why. My poor kids think their momma has lost it...I bought a tree (a very primitive tree....it looks burnt!!) While I was putting it together Aiden (my youngest) asks "It's Christmas already??" I said..."No silly...this tree is brown..it's to celebrate Fall!". Of course..this was still in the month of August and the kids had not even returned back to school~silly me!!

If you have any questions on anything you see in the Holiday Mini Catalog, please don't hesitate to ask...I bought pretty much verything in there..and there are some COOL new tools to play with!!

Let me introduce you to Simply Scored (a scoring board)...LOVE IT!!
Details:
The Simply Scored Scoring Tool’s base fits paper or card stock up to 12" x 12" and features score tracks every 1/8". Features two easy-to-read rulers (with inch markings down to 1/8") along top and left side for perfect scoring. (One standard left-to-right ruler and one zero center ruler). Includes three moveable tabs and stylus. Bottom has non-marking, no slip feet. Measures approx. 15 1/8"x 13 1/4"x1"
Over the weekend as I finish my Halloween decor... I will show you what I made....but here is an up close sample of scored paper medallions made by Stampin' Up!...isn't it beautiful??
Happy Stampin'
~Erin

Thursday, August 11, 2011

'Good-bye' Summer....'Hello' Fall!!

So many goodies to share with you today...first and foremost here are the projects that we will be making at my next Stamp Camp: This Friday (August 12, 2011 7-9pm) Click here for other upcoming scheduled events. If you have already seen the new Idea Book & Catalog then you know about all the new accessories and stamps..one of my latest favorites is the 3/8" ruffled ribbon!! Just sitting on the spool it looks so pretty!!   

This is a 'good-bye' to summer card: Love the colors...so bright and cheery!! It uses the level 2 hostess set in the Summer Mini Catalog Love & Care..it's a really fun set I created so many cards it was hard choosing which one to demonstrate!! Had to go with this one because it uses my favorite ribbon!!
Card Recipe:

Stamp Set: Love & Care (123020 W, 123022 C)
Card Stock: Whisper White, Calypso Coral
Ink: Calypso Coral (marker), Daffodil Delight, Melon mambo, Temting Turquoise, Old Olive (marker)
Accessories: Floral Fusion Sizzlits (115969), Scallop Edge Border punch (119882), basic rhinestones (119246), Designer Frames embossing folder (123130), glue dots (103683), Calypso Coral 3/8" ruffled ribbon (122976)


 Don't forget to stamp the back of your cards to let the recipient know you made them with love: this uses our new Angel Policy stamp set called Creatively Yours (122610 W, 122612 C).

Next are my 'hello' to fall goodies:
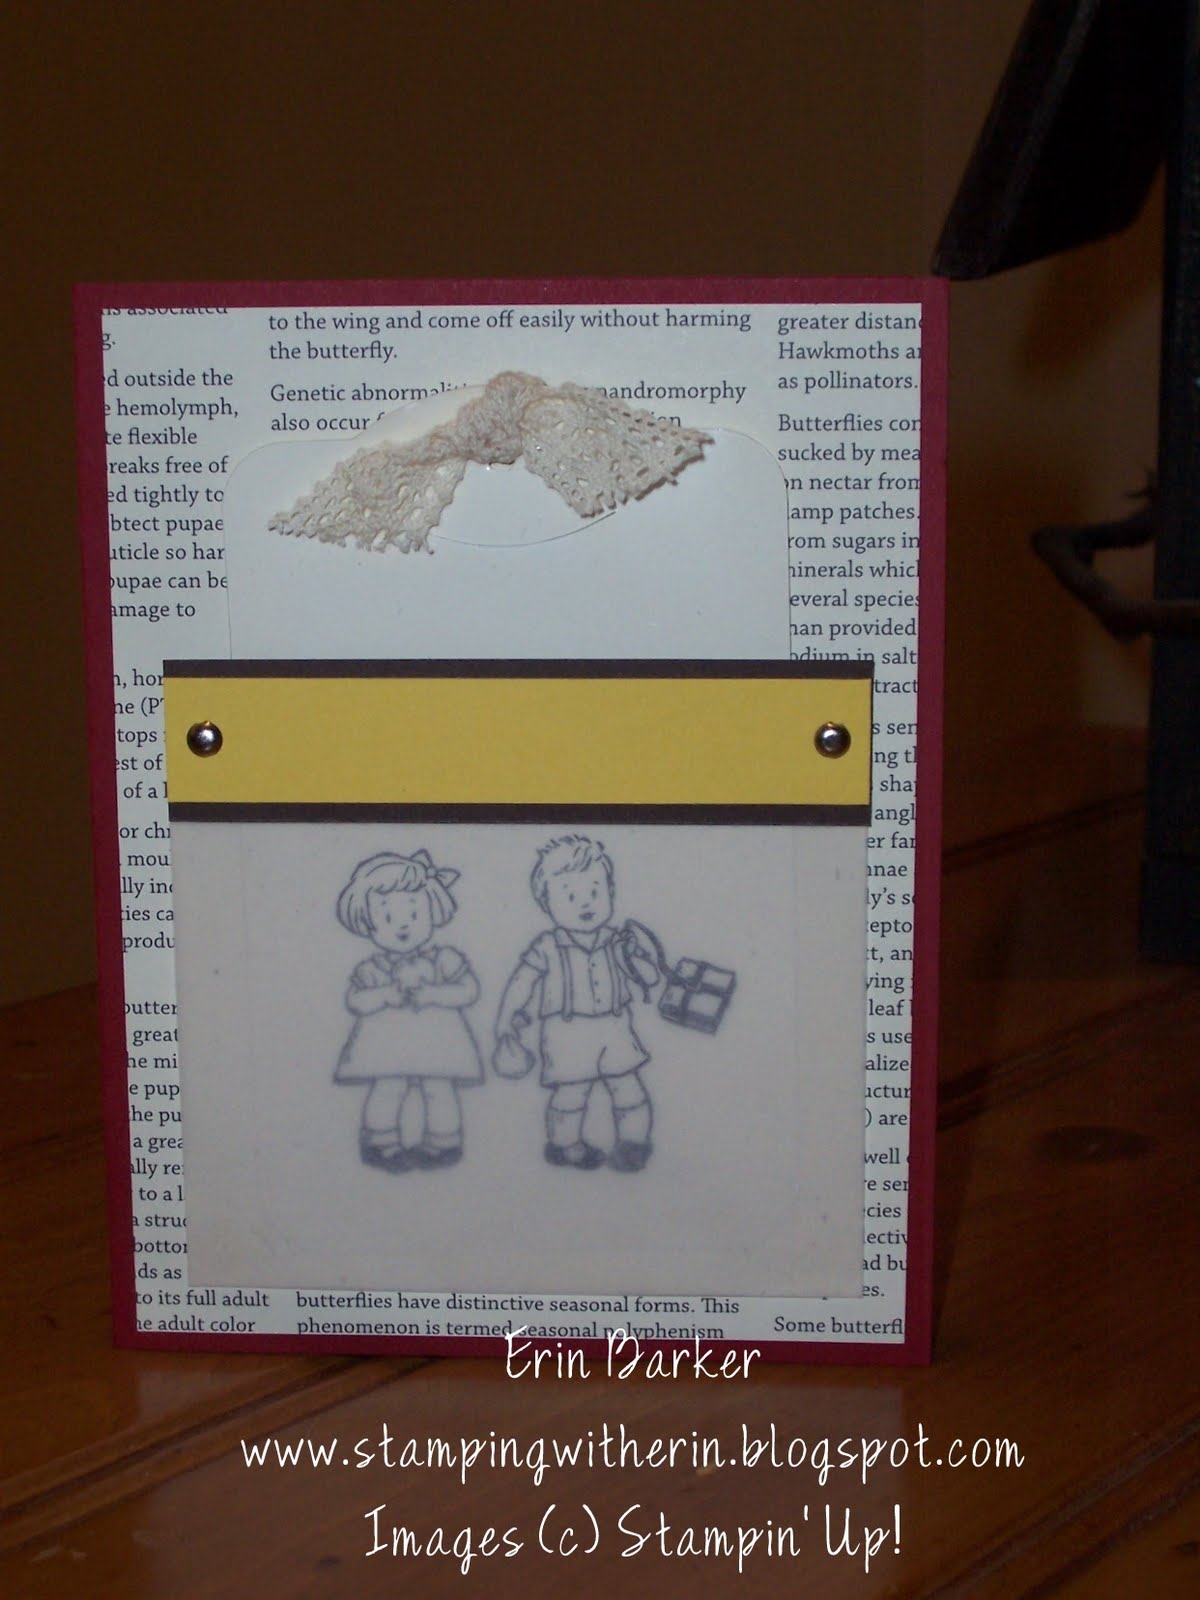
This card I received as a 'WOW' swap at Convention. Let me tell you...I was completely 'WOWED'!! It is called a Magic Color Card...and now you will see why...

View closed


View open

I know...isn't it AMAZING??  It comes from a fellow demonstrator Teresa Evangelista in Florida, I contacted her to see how she came up with this beauty because it is such and awesome technique!! (Thanks for the incredible inspiration Teresa!!) The tag was made using Sizzix Big Shot (113439) and Two Tags die (115954)..there is a trick too on how to avoid the score lines on the die...mark on the side where the fold is (I used our white Signo gel pen (105021)). Then roll the die into the Big Shot as you normally would but don't go all the way through...stop at the line you drew and back out...turn the die around and do the other side. Then use your paper snips to cut it out...GENIOUS!! I am thinking about making a video tutorial but with her permission..so I'll let you know!!
This is perfect for 'back-to-school'..my kids head back on August 24th.... Do you remember the commercial...where the dad is singing "It's the most wonderful time of the year!" I honestly have mixed emotions about it~ last month I decided it was time to go back to work since the kids are getting older. I have spent the last 13 years as a a SAHM and LOVED every moment!! So now during the days that I am at work I miss them terribly!! The last two days I was scheduled off and I have caught up on the laundry...gotten ready for tomorrow's Stamp Camp and cleaned the house...now it's time to relax with the kids and do some school shopping!!

Card Recipe:
Stamp Set: Greeting Card Kids (119887 W, 120633 C)
Card Stock: Cherry Cobler, Very Vanilla, Vellum, Daffodil Delight, Early Espresso, Naturals Ivory, First Edition DSP (121878)
Ink: Staz -On black, Stampin' Write markers: Real Red, More Mustard, Not Quite Navy, Daffodil Delight, Early Espresso, Crumb Cake
Accessories: silver brads (104336), window sheets (114323), Victoria crochet trim ribbon (118481), paper-piercing tool (116631) and mat pack (105826).

                 
Lastly is this decorated Fancy Favor box, made with the Fancy Favor die (115965) for the Sizzix Big Shot. Here is an image of the side:

The flower was created using the ornament punch (119847).


 My downline Anne Butterfield made/cased this cute little rose box using the same ornament punch and hand-created box. She sponged the edges to add dimension and it's BEAUTIFUL in person!!


Side view
Both are similar, hers used more petals which created a fuller flower....now here is a CUTE idea~ before I attached mine to the box, it was laying flat on the table..I thought about how cool it would look holding a tealight candle in the middle?? The possibilities are endless. Not sure if you can tell from the photo but the entire flower was spritzed with rubbing alcohol and the Champagne Mist shimmer paint (116806) this stuff makes everything prettier. I added an Antique brad (117273) to the center of a 1" circle punch (119868) and popped it up with dimensionals (104430). Hint: both the flower and box are held together using sticky strip (104294)...it is a must-have adhesive when creating 3-D projects.

That's about it for today, as summer comes to and end think about what the upcoming months have in store... Halloween, Thanksgiving...and Christmas!!! The next Holiday Mini catalog has SO many cute things to get your creative juices flowing...it's so exciting sitting here thinking about all the goodies I'm planning on making so stay tuned!!
Take care,
Happy Stampin'
~Erin

Sunday, July 31, 2011

Today is the last day to sign-up with our FABULOUS promotion!!! If you have contemplated joining Stampin' Up! then check out the above video, Shelli Gardner has announced that she will be making a video tutorial and we can watch and stamp right along with her making a CUTE Holiday Keepsake box!

Join for the discount and be your best customer or for just $99 start your own business today!!
If you have any questions about joining, please contact me today, I would love for you to become part of my team Shamrock Stampers!!
Stampin' hugs~
Erin

Later today I will be posting LOTS of goodies from my recent trip to SLC Utah 2011 Convention...stay tuned!!

Friday, July 1, 2011

The new 2011-2012 Idea Book & Catalog is here!!

The day has arrived....it's here!!! If you have not yet received your copy of this beauty contact me today!! Click here to view online. My 'Wish List' is growing my the minute..too many cute things I want/need!! If you are interested in hosting a workshop then now is the time...there is a new hostess program where you can even earn merchandise 1/2 off!!
I have been busy working on all my swaps for Convention in SLC, Utah!! I can't wait to come back and share my experience. Three members of my downline group 'Shamrock Stampers' are joining me and it is going to be a blast!!
Want in on all the fun?? Announced today is a $99 Starter Kit Promotion and along with the Starter Kit contents you will get a FREE Christmas Keepsake Project Kit ($40 value).
Isn't it cute??
Contact me today if you have any questions!!
Happy Stampin'
~Erin

Monday, June 20, 2011

Spring?? No...it's SUMMER now!!!

Can summer be here already?? The above photo is from Memorial Day weekend...a true sign that summer is here!! We set up our 'redneck' pool and it didn't take long for the water to warm up! Those few days were in the 100's~ my kind of weather!! Today it doesn't feel like it at all~ we (the family) are at Lake Anna for a few days and the water is actually warmer than the air (current outside temp is about 70 degrees). The kids went fishing this morning and caught a few catfish and have asked to swim....but I honestly think it's too cold for me! I have bribed them with sweets and indoor games. We might travel in to the big ol' town of Louisa today to look for movies or bowling.
Since I am on 'vacation' I am able to catch up on much needed blogging, e-mails and updates.
Not even sure what was going on in my life in my last post...since it was so long ago!! First thing was our computer in the basement (our main PC) decided it didn't want to work anymore..it was less than 6 months old!! It has since been serviced twice and seems to be okay (thank-goodness). It is the computer that I use for Stampin' Up! so for that time I pretty much took my stampin' business on hold. It feels good to get back in with both feet!! Stay tuned for all the latest news and updates.
After Memorial Day came the end of the school year and graduation...as the school year ended we were busy with making plans for parties, family and friends coming to visit. The month of June rolled in like a wild fire!! Our oldest son Ryan graduated highschool...where does the time go? In the fall he will attend Howard County Community College. Ready for a card??
Here is the card I made for his graduation: I have posted a few pictures so you can see how it opens. Click here for a tutorial on how to make 'flip' cards.
Stamp Set: Sail Away (123013), Live, Laugh, Love (117114), Sanded (109294)
Card Stock: Night of Navy, Crumb Cake, Very Vanilla, Cherry Cobbler, Soft Suede
Ink: Crumb Cake, Soft Suede, Night of Navy and Soft Suede Stampin' Write marker
Accessories: Night of Navy 3/8" taffeta ribbon (120933), Mini Vintage Tags (118763), Square Lattice embossing folder (119976), Shimmer Paint Champagne Mist (116806)
Here is the other side, hard to tell from the photos but the Very Vanilla CS was sprayed with the shimmer paint since the mini-vintage tags are shimmery...did you know that?? I didn't (oops!!)
As you may already know...the Stampin' Up! Retirement List has been issued for stamps and accessories...have you checked it out yet?? This card actually used two stamps that are retiring (Sanded Background stamp and Live, Laugh, Love)
So check your Wish List's and make sure to place your orders ASAP before they are gone for good!! Shop 24/7 on my website.
If you would like the new catalog please contact me today via e-mail and I'll be sure to get you one!! Wait till you see it~ orders will be able to be placed with the new catalog beginning on July 1st!!!
Stampin' Hugs~Erin

Wednesday, April 20, 2011

Spring is Blossoming!!

Have you ordered your Paisley Petals DSP (122367) yet?? Remember that it's part of the 'Spring Is Blossoming' Promotion...I have already gone through an entire pack!! There are two ways that you be part of this great 'sneak peak' treat...yup these goodies will be featured in the next Idea Book & Catalog...and you can order them NOW or WAIT until the catalog goes live in July. (click the link above to see details)
Here I have to share with you some project that I made...these two cards are what we will be making at my next Stamp Camp.
Here is the first one:
Doesn't it scream Paris!!!! I have never actually been... I have been all over the country (Continental USA and Costa Rica) that's it~ I hate flying...my feet were meant to be on the ground!! I am waiting to grow out of my fear of flying because there is SO much to see in our BEAUTIFUL world!!
However I did recently book my ticket to fly to Salt Lake City, Utah for Stampin' Up!'s Convention (July 13-16th 2011)!!! I am so stinkin' excited that my fears have all been shoved to the back of my brain (for now!!) Hey..I can order wine on the plane right?? (hee hee)
Here is a close up of the 'beautiful' Eifel Tower... it's a little hard to tell from the photo that I embossed with silver embossing powder.
When my son Tyler was two years old...(yes I did say 2) he had a passport and went to Paris with his grandparents!! I have pictures of him as a baby doing all the 'touristy' things and he saw the Eifel tower..no I am not jealous AT ALL!!! Sadly...he was too young and doesn't remember...but he's not going back before I go!!
Additional details:
Stamp Set: Artistic Etchings (118517 W, 120573 C), Clearly For You (121911 W, 121976 C)
Card Stock: Very Vanilla, Soft Suede and Paisley Petals DSP (122367)
Ink: Soft Suede, Tangerine Tango, Versamark Accessories: Very Vanilla Seam Binding Ribbon (120999), silver embossing powder (109131), heat tool (100005), Vintage Wallpaper embossing folder (120175), Big Shot (113439), silver brads (104336), Boho Blossoms extra-large punch (119858), dimensionals (104430) glue dots (103683), sponges (101610)
Tip: The Tangering Tango ink is much darker than what you see here, so using ,your grid paper or scratch piece stamp off then stamp your image...perfect match!!
Here is the next card:
Again... I used the same Paisley Petals DSP (122367)which is so vibrantly beautiful~ there is such a variety that match many other colors, it's hard to choose which CS base to use...here I decided on River Rock.
Card Details:
Stamp Set: Clearly For You (121911 W, 121976 C)
Card Stock: River Rock, Whisper White, Early Espresso, Peach Parfait, Paisley Petals DSP
Ink: Early Espresso 'Classic' Ink* (see note below)
Accessories: clear embossing powder (109130), heat tool (100005), 5/8" Early Espresso satin ribbon (119753), Styled Silver Hodgepodge Hardware (111325)
*Please note: When you use embossing powder with classic inks...you need to sprinkle your powder quickly as classic ink dries FAST...or you could emboss with 'pigment' ink such as our Craft Stampin' Spots.
We will also be making this adorable bookmark...the flower is made out of CS...and is so pretty in person you would think that it was fabric...which made me think "Hey...our fabric would be perfect for these too using the same die!" Here is a close-up: Can you see the shimmer?? So pretty!! It makes me smile!! For details check out Dawn Griffith's video tutorial. As she would say "Love it!"
But this was much faster and perfect for a Stamp Camp...I tried looking for a cute book to share with you and remembered I lent it to a girlfriend (oops!). The book I am referring to?? Now made into a must see movie.. Emily Giffin's Something Borrowed?? I read it a few years back along with her othes and am waiting to read 'Heart of the Matter' but I think I am leaning towards the purchase of a Kindle~ and a new camera, and a new hip??
Yup...my MRI is scheduled for this Thursday~ I'm a bit worried about what they will say is wrong. What if at 35 years old I need a 'hip replacement'?? I am a tad bit of a 'drama queen' and always assume the 'worst case scenario'. Just typing the drama queen bit reminded me that I have to share pictures of my Simply Adorned charms...I am going to be teaching a class (Stamp Camp) and those details are coming soon too...my mind is just racing of all the things I have lined up and to share..so even though I have not posted in awhile~ doesn't mean I haven't been busy in my little stampin' cave!! Until next time....happy Stampin'!
~Erin
In tomorrow's post I will show the magnetic board we'll be making too!!
P.S. These are great gifts for teachers and May 3rd is National Teacher Appreciation Day!!

Thursday, April 7, 2011

Petal Cone Carrot!!

Hey there~ I am just loving the new Petal Cone die (121810)...I know I mentioned that I liked it in a previous post (where I made the ice cream cone card??) Well...there are just SO many reasons to buy this die~ it does SO much!! Sure this is a carrot, but as shown in the Occassions Mini Catalog, there were several more ways that it was decorated to make a great treat holder...it's a perfect size for a bunch of treats!! This is how it's opened...you just slide the button up the grosgrain ribbon..and ta-da!! Don't you just love the little bunny tail??
Angie Kennedy Juda has a great video tutorial on how this box was made: click here to watch.
Other details:
Stamp Sets: Forest Friends (113748), Something to Celebrate (hostess level 2: 121897 W, 121955 C)
Card Stock: Peach Parfait, Whisper White, Crumb Cake
Ink: Crumb Cake, Peach Parfait
Accessories: linen thread (104199), 1/8" Certainly Celery taffeta ribbon, 1/4" Certainly Celery grosgrain ribbon, Springtime Vintage Big Designer Buttons (122301), dimensionals (104430), 1 3/4" scallop circle punch (119854), 1 3/8" circle punch (119860), Texture Plates Kit #4 (114531) and Mr. Big Shot!
I apologize for the blurry photo..I am in desperate need of a new camera~ my cheesy Kodak has seen enough...I accidentally dropped it a few weeks ago and since then it's been even worse (go figure!). I hope to get a new one before I go to Convention~ there will be so many pictures to take...anyone have any suggestions on a good 'point & shoot'?
Now...here is another cute and clever 'CASE' (copy and steal everything). This idea comes from Mary Fish who also shows a quick video on how to use the Petal Card Extra-Large punch (119273) to create a little box that is the perfect size for little Hershey kisses!! Wouldn't these be cute at the dinner table as place settings??
For the chick: I used Crumb Cake CS for the box and Whisper White 1" circle punch (119868) for the egg (then just cut zig-zag pattern for 'cracked' look. The Daffodil delight CS (chick body) was punched using the 3/4" x 15/16" oval punch (120908) from the Holiday Mini Carryover List and the wing, beak and eye is from the Two-Step Owl Extra-Large punch (118074). I then wrapped 1/8" Daffodil Delight ribbon around the box...cute huh??
For the bunny: I used Whisper White CS and the 3/4" circle punch (119873) for the head, the same oval punch noted above for the body and then for the ears I used 5-Petal Flower punch (119880)....then using the 2-way glue pen (100425) added the cute 'cotton tail'. Oh~ almost forgot...the whiskers were made with .7mm jewelry cord (attached on the back with mini glue dots). Wrapped this box with Certainly Celery 1/8" taffeta ribbon (119255).
Since I was on a roll and I really like these 'soft' colors for Easter~ I decided to make something for Home Decor: The letters were cut out with Mr. Big Shot and the Serif Essentials dies (113464). The bunny was made the same way as noted above...his butt is too cute!! The 'egg' behind the letter 'I' was embossed with clear embossing powder (hard to tell from photo). Now..notice the 'eggs' behind the 'S'? Those are also the SAME oval punch as noted above...so order yours now!! I love this one!
Other details:
Stamp Set: A Good Egg (114974)
Card Stock: Crumb Cake, Whisper White, Chocolate Chip, Certainly Celery, Daffodil Delight, In Color DSP (hostess level 1 121028)
Ink: Daffodil Delight
Accessories: Brights Brads (119740), linen thread (104199), 1/8" Daffodil Delight taffeta ribbon (119254), Mini Glue Dots (103683), Clear Embossing Powder (109130), Bitty Buttons (118761), Itty Bitty Shapes Punch Pack (118309)
Here is another view to show the accordian way it folds:
Directions: Cut 1 piece of CS at 12" x 3" (score every 3"), then attach that to another piece that measures 9" x 3" and score that one too every 3". Decorate as desired!!
Blogging tips